


ESP32 Bootcamp: A Step By Step Practical Approach
Master ESP32 and IoT from scratch—build Wi-Fi & Bluetooth projects, web servers, database controls, and real-time sensor alerts.
#1 Most Popular Online Course & Internship in Computer Science You can enroll today & get certified from EasyShiksha & HawksCode.
 Build real-world projects
Internship with certificate
Resume-ready experience
Beginner to advanced
Lifetime access
Interview prep included
Build real-world projects
Internship with certificate
Resume-ready experience
Beginner to advanced
Lifetime access
Interview prep included
 Updated July 27, 2026
Join 5,00,000+ students already enrolled worldwide
No risk — 30-day full refund guarantee
Start instantly after payment — access in seconds
Certificate + Internship Joining Letter included
Updated July 27, 2026
Join 5,00,000+ students already enrolled worldwide
No risk — 30-day full refund guarantee
Start instantly after payment — access in seconds
Certificate + Internship Joining Letter included
 Free Preview
 73 On-demand Videos
 Internship Joining Letter
 2 Certificates (Course + Internship)
 Lifetime Access
 1 Quiz + Assignments
 Mobile & Desktop Access
Why This Course and Internship Stands Out
See exactly what separates EasyShiksha students from everyone else
 Watching scattered YouTube
videos with no structure
No certificate — nothing to show
employers
No internship experience on
resume
Wasting months without clear
direction
Struggling to stand out in job
applications
No proof of practical skills
Structured, beginner-to-advanced
learning path
Verified certificate — shareable
on LinkedIn
Real internship offer letter for
your resume
Go from zero to job-ready in one
programme
Resume-ready experience before
graduation
Practical projects you can show
any recruiter
Watching scattered YouTube
videos with no structure
No certificate — nothing to show
employers
No internship experience on
resume
Wasting months without clear
direction
Struggling to stand out in job
applications
No proof of practical skills
Structured, beginner-to-advanced
learning path
Verified certificate — shareable
on LinkedIn
Real internship offer letter for
your resume
Go from zero to job-ready in one
programme
Resume-ready experience before
graduation
Practical projects you can show
any recruiter
Internship Opportunity Included With This Course
"This is not just a course — it's real career experience. Walk away with documents that prove your skills to any employer."
This Course is Perfect For
Whether you're starting from scratch or switching careers — this course is designed with your success in mind.
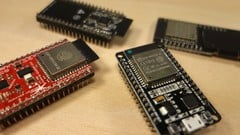
From Zero To Professional in ESP32, Enter the Internet of Things world with this Bootcamp
In this ESP32 Bootcamp, you will learn in a Step-By-Step practical approach, this course will guide you through creating your first Internet-connected electronics project using a Wi-Fi enabled board, which is the famous ESP32.
Why you should take this course?
-
Guide to ESP32 features
-
Learn ESP32 programming from scratch by following step by step practical tutorials with clear explanations.
-
Hands-on tutorial with clear explanation
-
Practical approach for beginners to have a good understanding of the topic.
-
Understand ESP32 programming to control the RGB LED lights, Wifi module, BLE module through Arduino IDE.
-
Explore the Internet of Things world with the practical examples to build your own IoT projects.
-
Get familiarized with using arduino libraries and develop custom libraries in order to make your projects stand out.
-
Develop apps for Android or IOS.
You will learn the elaborate workflow of hardware and software that makes smart objects succeed through Basic Step-By-Step Practical examples of the most common things you want to build.
What you learn in this course:
-
A quick introduction to the Internet of Things World with ESP32.
-
How to write your very first code.
-
How to program this board without coding, if you are not a fan of coding, this will help you start making great projects without writing a single line of code.
-
How you can easily connect ESP32 and Arduino board together and make use Of the power of the Arduino hardware and how to implement this to exceed the number of inputs and outputs and your board.
-
A practical example, which is the smart garden Internet of Things ESP32 based project, and we will use the Blynk app to control this project.
-
ESP32 database control and how you can display anything anywhere.
-
Create a website and display different information from your ESP board
-
How to make a Web server using ESP32 and how you can easily get email alerts based on sensor reading using ESP32.
There are other surprises inside the scores, and I am sure that after taking this course you will gain a lot of knowledge and you can easily start coding your ESP board and make any project that comes to your mind.
We provide 24/7 support for our students, so if you have any questions, you can easily contact us using our profile here.
A Different IoT Power and Performance, Use ESP32 microcontroller to MAKE IoT projects to unleash your creativity
This is a complete bundle to get you started in IoT
-
IoT Internet of Things Crash Course: Step by step is a course specially created for Electronic Geeks & Engineers who want to take their Electronics and Microcontroller Projects to the next level, adding Wifi, Bluetooth connectivity and more processor power while maintaining battery life
-
ESP32 Email Alert Based on Sensors Reading: Send Emails using ESP32 and Arduino IDE coding easily and effectively and unleash the power of coding and ESP32 Hardware
-
ESP32 Web Server: Step by Step Course to create your very own standalone web server with ESP32 that controls output and display Data.
-
ESP32 + Databases to Control Anything Anywhere: Step by Step Course to help you create your first internet-connected electronics projects using ESP32 wifi breakout board
IoT Internet of Things Crash Course: Step by step is a course specially created for Electronic Geeks & Engineers who want to take their Electronics and Microcontroller Projects to the next level, adding Wifi, Bluetooth connectivity and more processor power while maintaining battery life <<<
Welcome to this course.
The course lesson will explain “How to work on ESP32 Board” by using C Language and the famous Arduino IDE development environment. This course will work best for you if your basic knowledge of Electronics and Arduino. You will learn how to interface the ESP32 Board with your Computer and Control it in no time.
ESP32 can be used in your Engineering projects, Industrial Projects, or IoT Home Automation related projects.
Why Learn ESP32?
If you an Engineering or Science student you might come across projects in which you want to control or monitor via internet, ESP32 with it's Robust Design, Ultra-Low Power Consumption, High Level of Integration and Hybrid Wi-Fi & Bluetooth Chip is the best fit to get started in Internet of Things World.
We will explore:
-
Digital Output: Blinking a LED
-
Digital Input: Reading a Touch Sensor
-
Analog Input: Reading a variable voltage from a potentiometer
-
Analog Output: Controlling a LED brightness
-
Analog Output: Controlling a Servo Position
-
Reading Temperature/Humidity Data with a Digital sensor
-
Connecting to the Internet and getting local time
-
Receiving data from a simple local web page, turning on/off a LED
-
Transmitting data to a simple local webPage
Missing this = losing the internship credential Missing this = losing your early-access advantage Missing this = falling behind candidates who did enroll
 Chat with us first → 73 On-demand Videos Course Completion Certificate
Internship Certificate
Internship Joining/Offer Letter
Letter of Appreciation (LOA)
Internship Attendance Report
Internship Evaluation Report
Internship Certificate Hard Copy
Project Report Assitance
Internship Project Assitance
1:1 Live Mentor Call
Course Certificate in Elegant Wooden Frame
2 Certificates (Course + Internship) Lifetime Access Projects & Assignments 1 Quiz + Assignments
Chat with us first → 73 On-demand Videos Course Completion Certificate
Internship Certificate
Internship Joining/Offer Letter
Letter of Appreciation (LOA)
Internship Attendance Report
Internship Evaluation Report
Internship Certificate Hard Copy
Project Report Assitance
Internship Project Assitance
1:1 Live Mentor Call
Course Certificate in Elegant Wooden Frame
2 Certificates (Course + Internship) Lifetime Access Projects & Assignments 1 Quiz + Assignments
Why Start Now?
The Opportunity Won’t Wait.
Every day you delay is a missed opportunity to grow your skills. Learners who start today gain the advantage — whether it's building skills, improving careers, or unlocking new opportunities.
Still Thinking?
Here's everything that makes this a no-brainer:
No prior experience needed — start from absolute zero Beginner friendly — explained step by step Risk-free — 30-day full refund guarantee One-time payment — access forever Student-friendly pricing — see details at checkout Real internship certificate includedWhat Happens After You Enroll?
From payment to certificate — here's exactly what to expect
Imagine After Completing This Course
Picture yourself 30 days from now — with skills, experience, and credentials that open real doors.
 Includes Internship