


Build 11 Arduino Practical Projects today!
Build 11 real-world Arduino projects, mastering sensors, coding, and hardware to turn simulations into fully functional devices.
#1 Most Popular Online Course & Internship in Hardware You can enroll today & get certified from EasyShiksha & HawksCode.
 Build real-world projects
Internship with certificate
Resume-ready experience
Beginner to advanced
Lifetime access
Interview prep included
Build real-world projects
Internship with certificate
Resume-ready experience
Beginner to advanced
Lifetime access
Interview prep included
 Updated June 29, 2026
Join 5,00,000+ students already enrolled worldwide
No risk — 30-day full refund guarantee
Start instantly after payment — access in seconds
Certificate + Internship Joining Letter included
Updated June 29, 2026
Join 5,00,000+ students already enrolled worldwide
No risk — 30-day full refund guarantee
Start instantly after payment — access in seconds
Certificate + Internship Joining Letter included

 Free Preview
 84 On-demand Videos
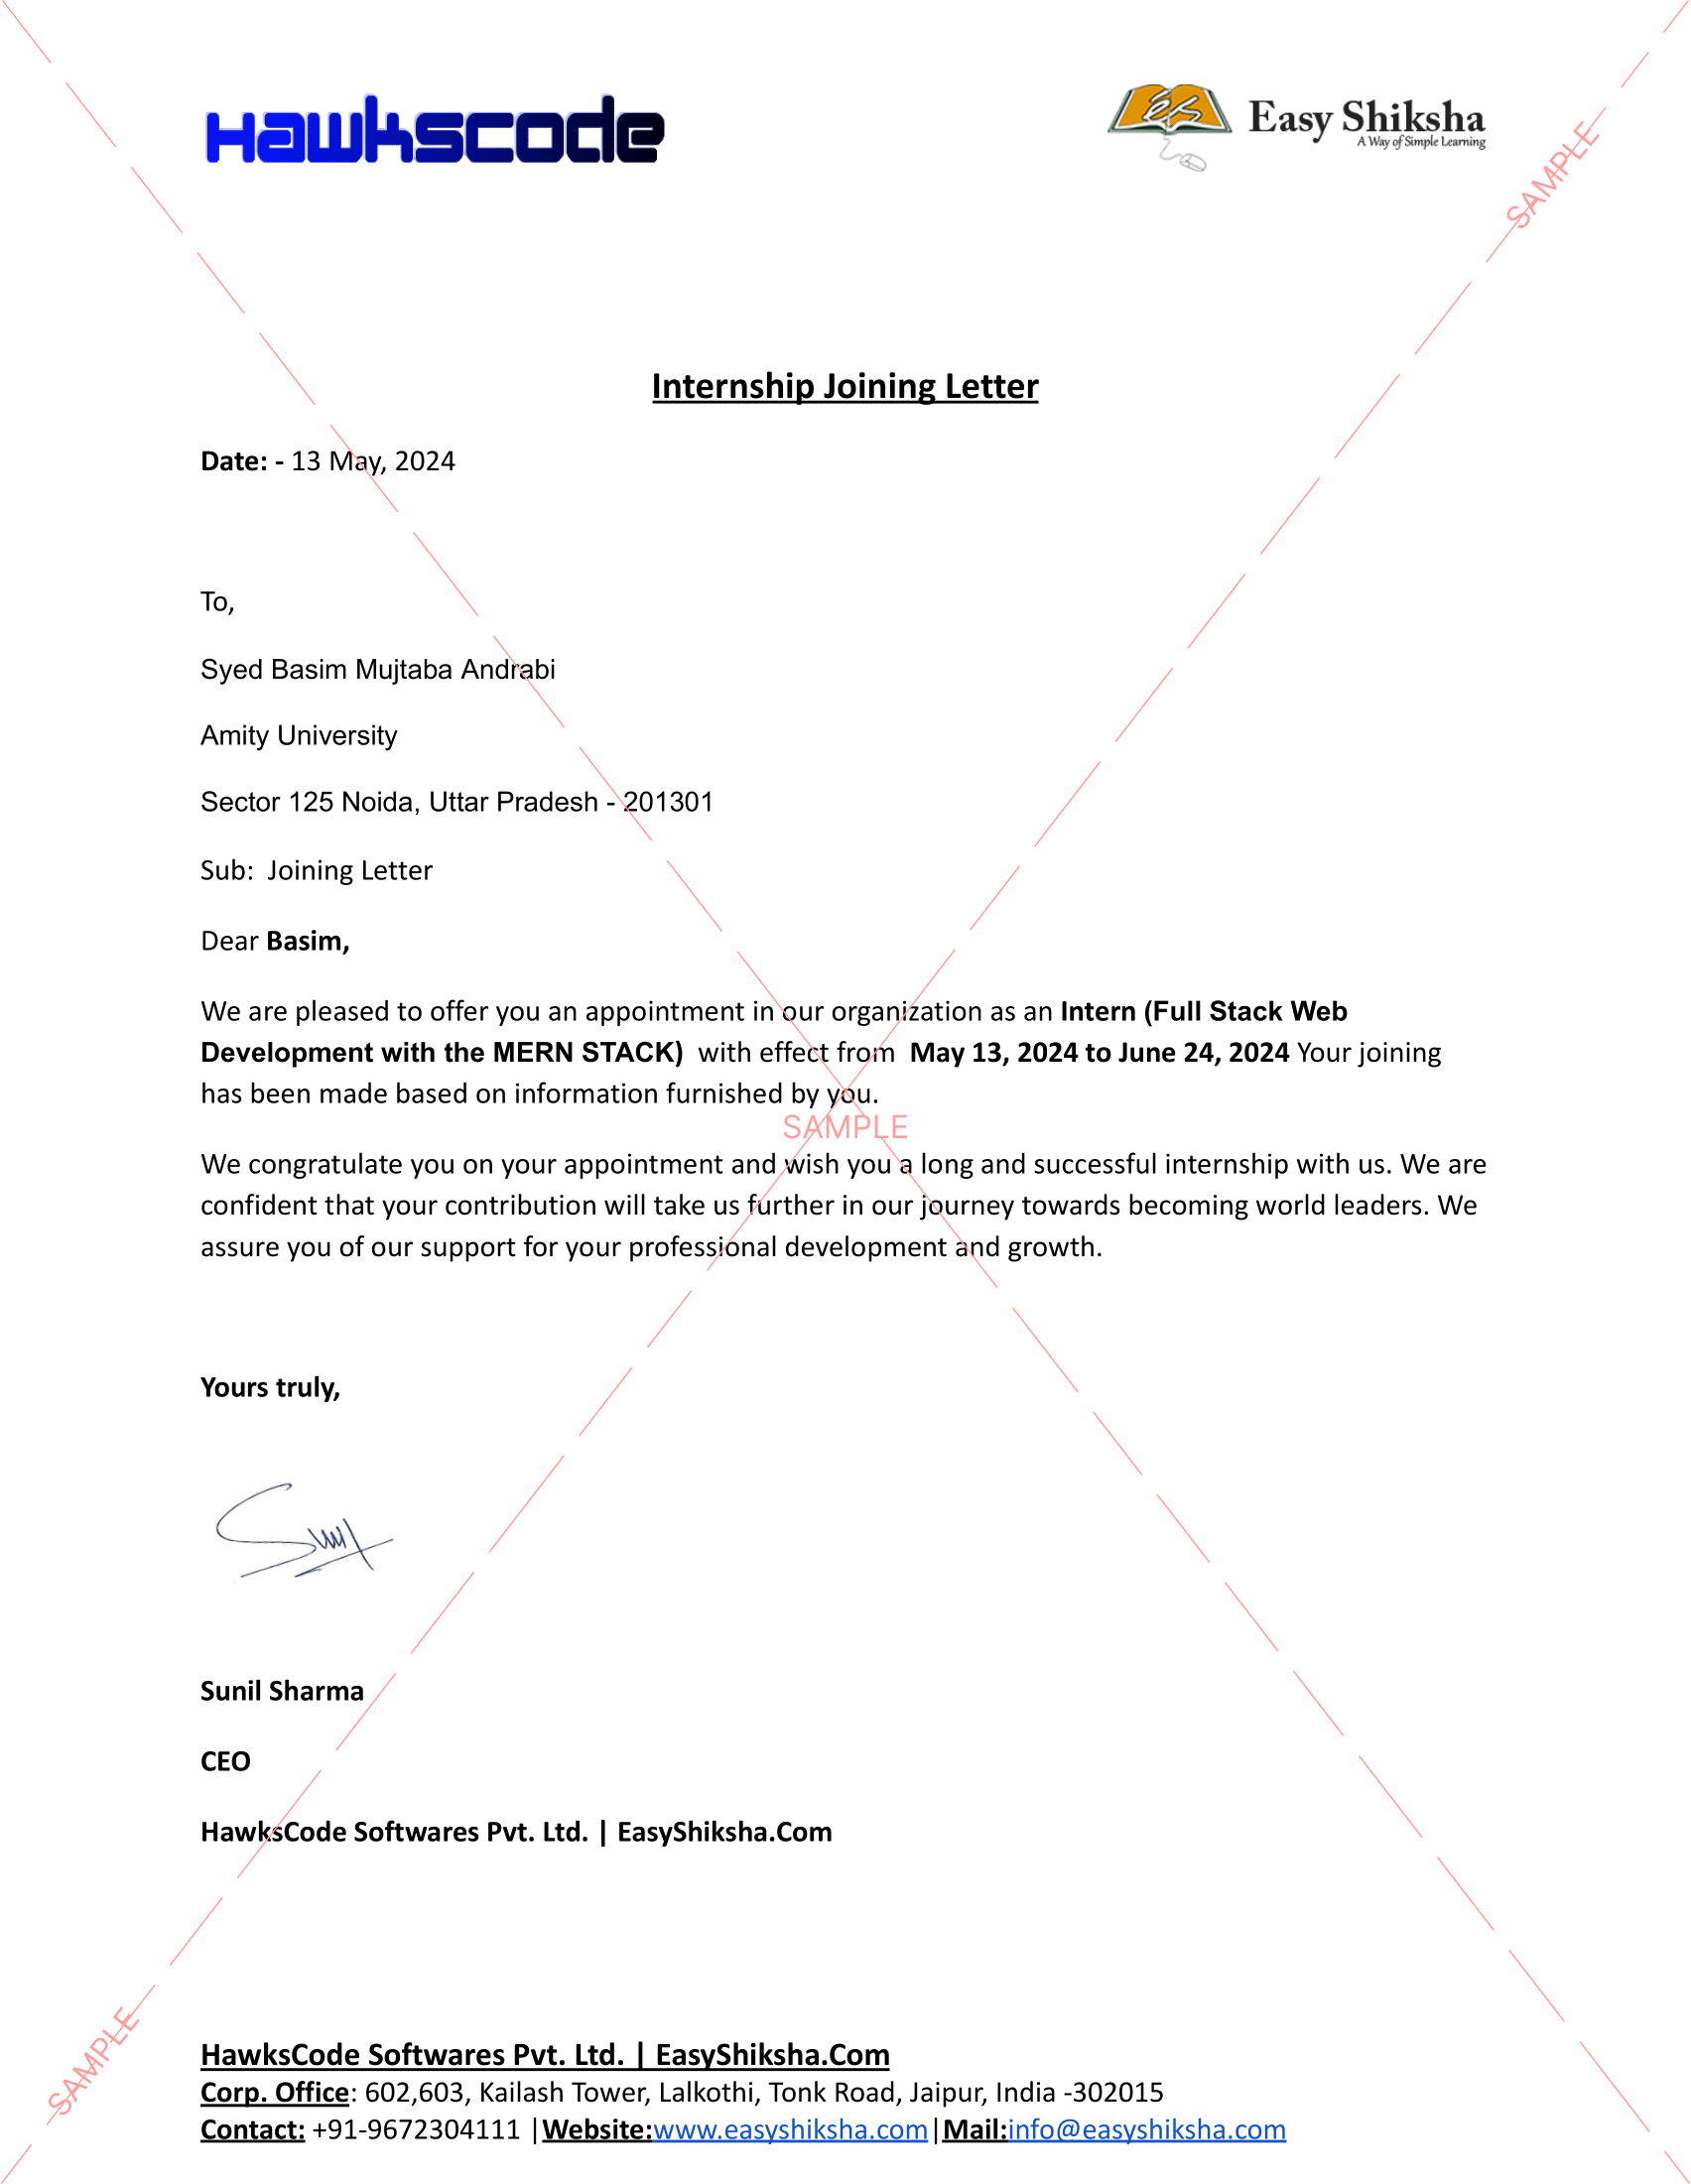
 Internship Joining Letter
 2 Certificates (Course + Internship)
 Lifetime Access
 Mobile & Desktop Access
Why This Course and Internship Stands Out
See exactly what separates EasyShiksha students from everyone else
 Watching scattered YouTube
videos with no structure
No certificate — nothing to show
employers
No internship experience on
resume
Wasting months without clear
direction
Struggling to stand out in job
applications
No proof of practical skills
Structured, beginner-to-advanced
learning path
Verified certificate — shareable
on LinkedIn
Real internship offer letter for
your resume
Go from zero to job-ready in one
programme
Resume-ready experience before
graduation
Practical projects you can show
any recruiter
Watching scattered YouTube
videos with no structure
No certificate — nothing to show
employers
No internship experience on
resume
Wasting months without clear
direction
Struggling to stand out in job
applications
No proof of practical skills
Structured, beginner-to-advanced
learning path
Verified certificate — shareable
on LinkedIn
Real internship offer letter for
your resume
Go from zero to job-ready in one
programme
Resume-ready experience before
graduation
Practical projects you can show
any recruiter
Internship Opportunity Included With This Course
"This is not just a course — it's real career experience. Walk away with documents that prove your skills to any employer."
This Course is Perfect For
Whether you're starting from scratch or switching careers — this course is designed with your success in mind.
Learning by theory and simulation is only half the answer, but connecting, wiring, and burning a code to an actual Arduino, not a simulated one, is the other more important half. This is what we will cover in this course: learning by making Arduino Practical Projects.
Welcome to this course.
Learning by doing is what makes the difference between someone who learns and someone who applies what they learned.
In this course, you will get the chance to see Arduino in action, starting from simulation and moving forward to connecting the hardware and testing the code in real life. This will help you make sure your circuit works as expected and you can witness yourself building your first fully functional Arduino project.
The most important thing to note here is that when a circuit works in simulation, that doesn’t mean it will work in real life. In more than 85% of cases, the simulated circuit doesn’t work when you connect it.
Why You Should Take This Course?
- Step-by-Step Videos: Show you how to code and connect hardware.
- Coding Challenges: Teach you new programming concepts.
- Hands-On Coding: Practice real-world applications.
- Demonstrations: Easy-to-understand explanations on how circuits work and the purpose of each component.
What is the Best Way to Learn?
Learning by doing Arduino practical projects is the approach that I prefer. This method allows you to not only master new Arduino skills but also gain practical knowledge along the way.
Arduino Motion Detector: Step By Step Guide
Make your own Arduino Motion Detector and start catching intruders, controlling devices, and exploring many more cool applications. This course will show you how to build an Arduino Motion Detector Device that will trigger an alarm once an intruder is detected within a range of 6 to 7 meters. It will guide you step-by-step through understanding each component inside the device circuit, how it functions, and how to wire it up.
Arduino Radar: Step By Step Guide
Create your own radar using Arduino and get a green map showing objects on your screen in no time. This course takes you step-by-step through building your own radar station that collects data related to objects in the surrounding environment using ultrasonic sensors and a servo motor.
Arduino Web Control: Step By Step Guide
Make your own Arduino Web Control and start controlling any device you imagine using a simple webpage and Arduino. Learn how to interface and configure an Ethernet shield to control devices via the internet.
Automatic Weight Measuring Machine using Arduino
Learn how to make an Arduino Coin Operated Automatic Weight Measuring Machine. This guide will take you step-by-step through interfacing load cells with Arduino and converting data to display weight on an LCD or 7-segment display.
Automatic Irrigation System with Arduino
Create your own automatic irrigation system to stop manually checking your soil. This course will guide you through interfacing a soil moisture sensor with Arduino to automate the irrigation process.
Arduino Weather Station: Step By Step Guide
Build your own weather station using Arduino to measure temperature, humidity, and time. Learn how to wire and program sensors to display weather data on an LCD.
Arduino Multicolor RGB LED Lamp Controlled Using Bluetooth
Interface Arduino with a mobile app via Bluetooth to control RGB multicolor LEDs. This course will introduce you to mobile apps, Bluetooth control, and RGB LEDs.
Arduino Bluetooth: Step By Step Guide
Control your world using your smartphone with Arduino Bluetooth module interfacing. Learn how to control any device using Bluetooth technology embedded in your phone.
Arduino Wireless Power Transmission
Make your own Arduino Wireless Power Transmission project and learn the principles behind wireless power. This guide will show you how to build a wireless power transmission circuit with Arduino.
Arduino Alarm Clock Using a Real Time Clock and LCD Screen
Create your own Arduino Alarm Clock to set alarm times and interact with time and date variables. This course will teach you how to interface an RTC DS3231 module with Arduino and display time and date on an LCD.
Enroll today and have instant access:
- Easy-to-watch video lessons
- Practical activities
- Downloadable resources
- Premium instructor support
- Lifetime access to course updates
- Access to our exclusive student community
- 100% Money-back Guarantee
What You Will Learn
- Build 11 practical Arduino projects
- Interface various sensors and components with Arduino
- Write and test Arduino code for real-world applications
- Gain hands-on experience in electronics and programming
Missing this = losing the internship credential Missing this = losing your early-access advantage Missing this = falling behind candidates who did enroll
 Chat with us first → 84 On-demand Videos Course Completion Certificate
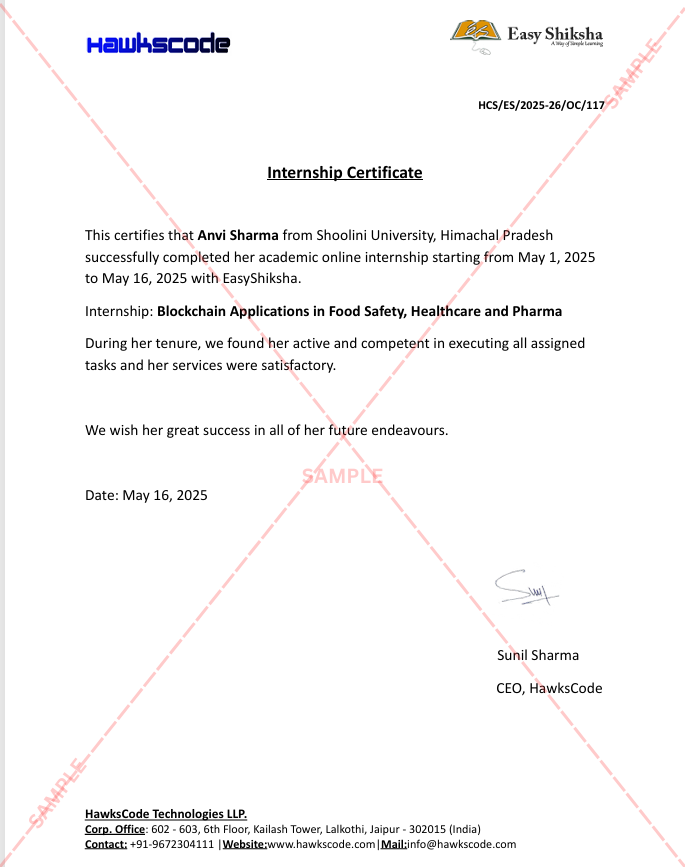
Internship Certificate
Internship Joining/Offer Letter
Letter of Appreciation (LOA)
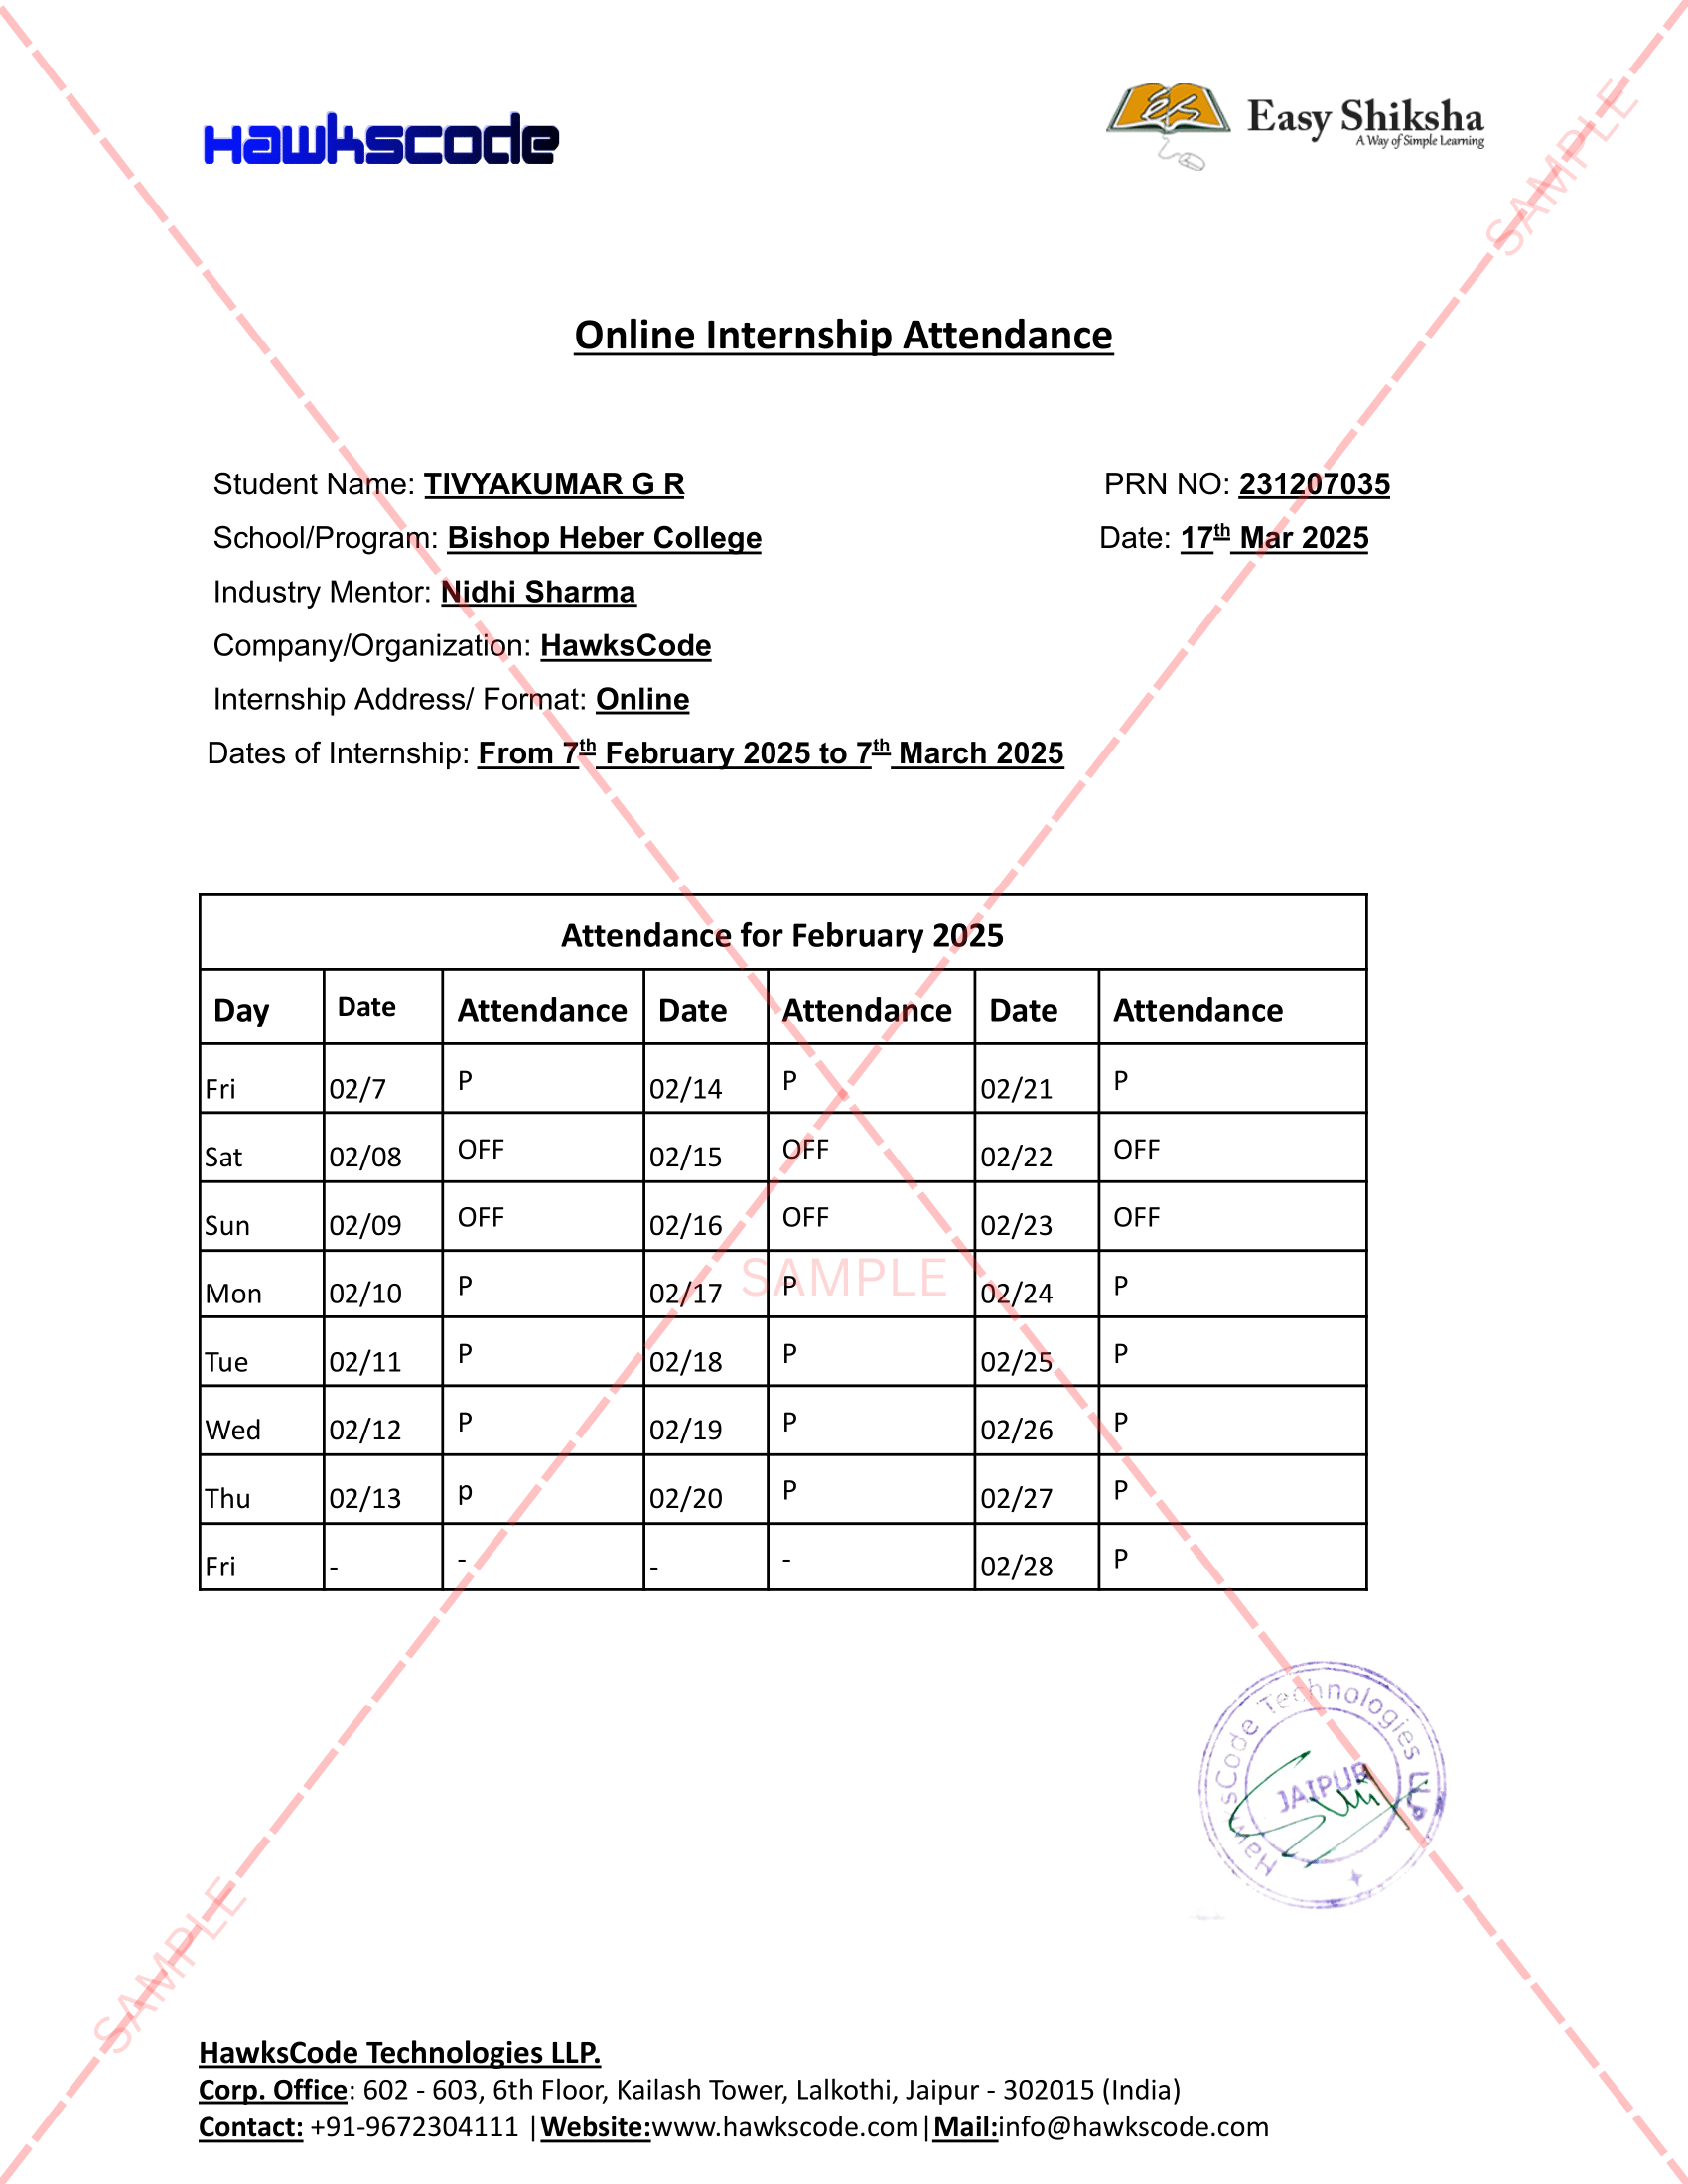
Internship Attendance Report
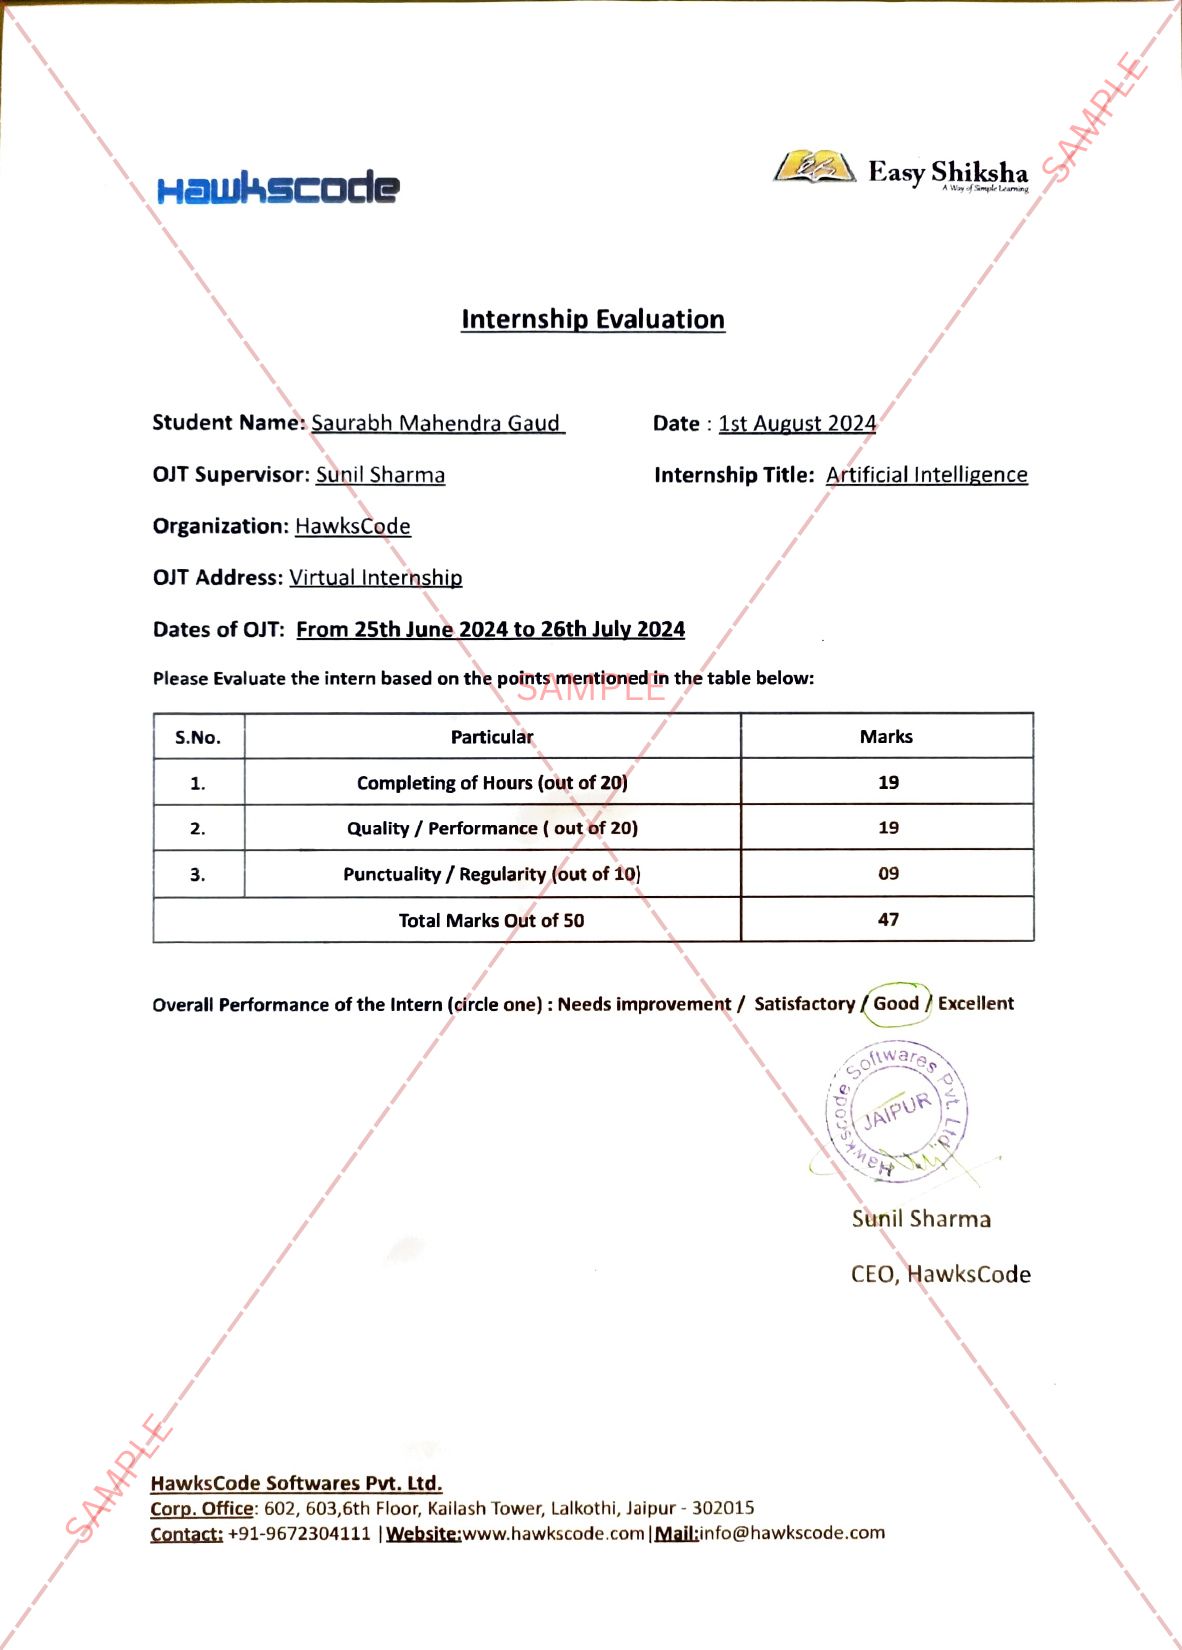
Internship Evaluation Report
Internship Certificate Hard Copy
Project Report Assitance
Internship Project Assitance
1:1 Live Mentor Call
Course Certificate in Elegant Wooden Frame
2 Certificates (Course + Internship) Lifetime Access Projects & Assignments
Chat with us first → 84 On-demand Videos Course Completion Certificate
Internship Certificate
Internship Joining/Offer Letter
Letter of Appreciation (LOA)
Internship Attendance Report
Internship Evaluation Report
Internship Certificate Hard Copy
Project Report Assitance
Internship Project Assitance
1:1 Live Mentor Call
Course Certificate in Elegant Wooden Frame
2 Certificates (Course + Internship) Lifetime Access Projects & AssignmentsWhy Start Now?
The Opportunity Won’t Wait.
Every day you delay is a missed opportunity to grow your skills. Learners who start today gain the advantage — whether it's building skills, improving careers, or unlocking new opportunities.
Still Thinking?
Here's everything that makes this a no-brainer:
No prior experience needed — start from absolute zero Beginner friendly — explained step by step Risk-free — 30-day full refund guarantee One-time payment — access forever Student-friendly pricing — see details at checkout Real internship certificate includedWhat Happens After You Enroll?
From payment to certificate — here's exactly what to expect
Imagine After Completing This Course
Picture yourself 30 days from now — with skills, experience, and credentials that open real doors.
 Includes Internship