

Complete PIC Microcontroller Bootcamp Course with University Certificate | EasyShiksha ร— Kalinga University, Raipur
University Certificate Programme ยท Trending for Students & Job Seekers
AICTE APPROVED INTERNSHIP โ˜… 5.0 RATING ยท 46,511 STUDENTS

Complete PIC Microcontroller Bootcamp

Master Complete PIC Microcontroller Bootcamp through real projects โ€” then graduate with a Certificate from Kalinga University, Raipur , NAAC B+ accredited institution, on top of your EasyShiksha Course and Internship certificates.
0Certificates issued
0On-demand video lessons
0+Students already enrolled
30-day money-back guarantee ยท Instant access ยท 128 students enrolled this week
Kalinga University es certificate preview es certificate preview
UGC Approved (Sec. 12B)
NAAC B+ Accredited
AICTE Approved
Est. 2013 ยท Raipur
4.9โ˜… Average Learner Rating
92% Would Recommend
๐Ÿ“„

Add Experience to Resume

Get an official internship credential that stands out โ€” even as a fresher.

๐Ÿ“ˆ

Increase Job Chances

Stand out in campus placements and job applications with real, verifiable experience.

๐Ÿ’ฐ

Boost Salary Potential

Developers with certified skills and an internship credential command higher starting salaries.

โšก

Start in 5 Minutes

Instant access after payment. No waiting, no shipping โ€” begin your career journey today.

5,00,000+Students Enrolled
3M+Learners Worldwide
4.9โ˜…Average Rating
96%Recommend This Course
85%+Prefer Certified Courses
100%Flexible, Self-Paced Learning
What You Walk Away With

Three credentials. One programme.

Every EasyShiksha benefit you already trust โ€” plus a university-issued certificate that carries independent institutional weight the moment a recruiter or placement cell looks at your resume.

01

Course Completion Certificate

Issued by EasyShiksha on finishing all 490 lessons, quizzes, and assignments in the Complete PIC Microcontroller Bootcamp curriculum. Shareable instantly on LinkedIn.

02

Internship Certificate

An official joining letter and internship completion certificate โ€” real, verifiable experience you can point to in any interview, even as a fresher.

03

Kalinga University Certificate

A signed Certificate of Completion from Kalinga University, Raipur โ€” , NAAC B+ accredited university. The credential that makes the rest of your resume easier to believe.

Most Valuable Benefit

Get real experience โ€” not just learning

"This is not just a course โ€” it's real career experience. Walk away with documents that prove your skills to any employer."

Official Offer Letter
Internship Certificate
Real-World Experience
LinkedIn Shareable

Many students use this internship as proof of experience in job interviews โ€” even as freshers with no prior work history. It's a real differentiator that sets you apart from hundreds of other applicants.

Offer LetterOfficial joining letter on company letterhead.
Internship CertificateVerified credential for your portfolio.
Real ProjectsHands-on experience with live deliverables.
LinkedIn BadgeShare your achievement publicly with pride.
See Before You Enrol

Your certificates, up close

No guesswork โ€” here's exactly what lands in your hands (and LinkedIn profile) when you finish the programme.

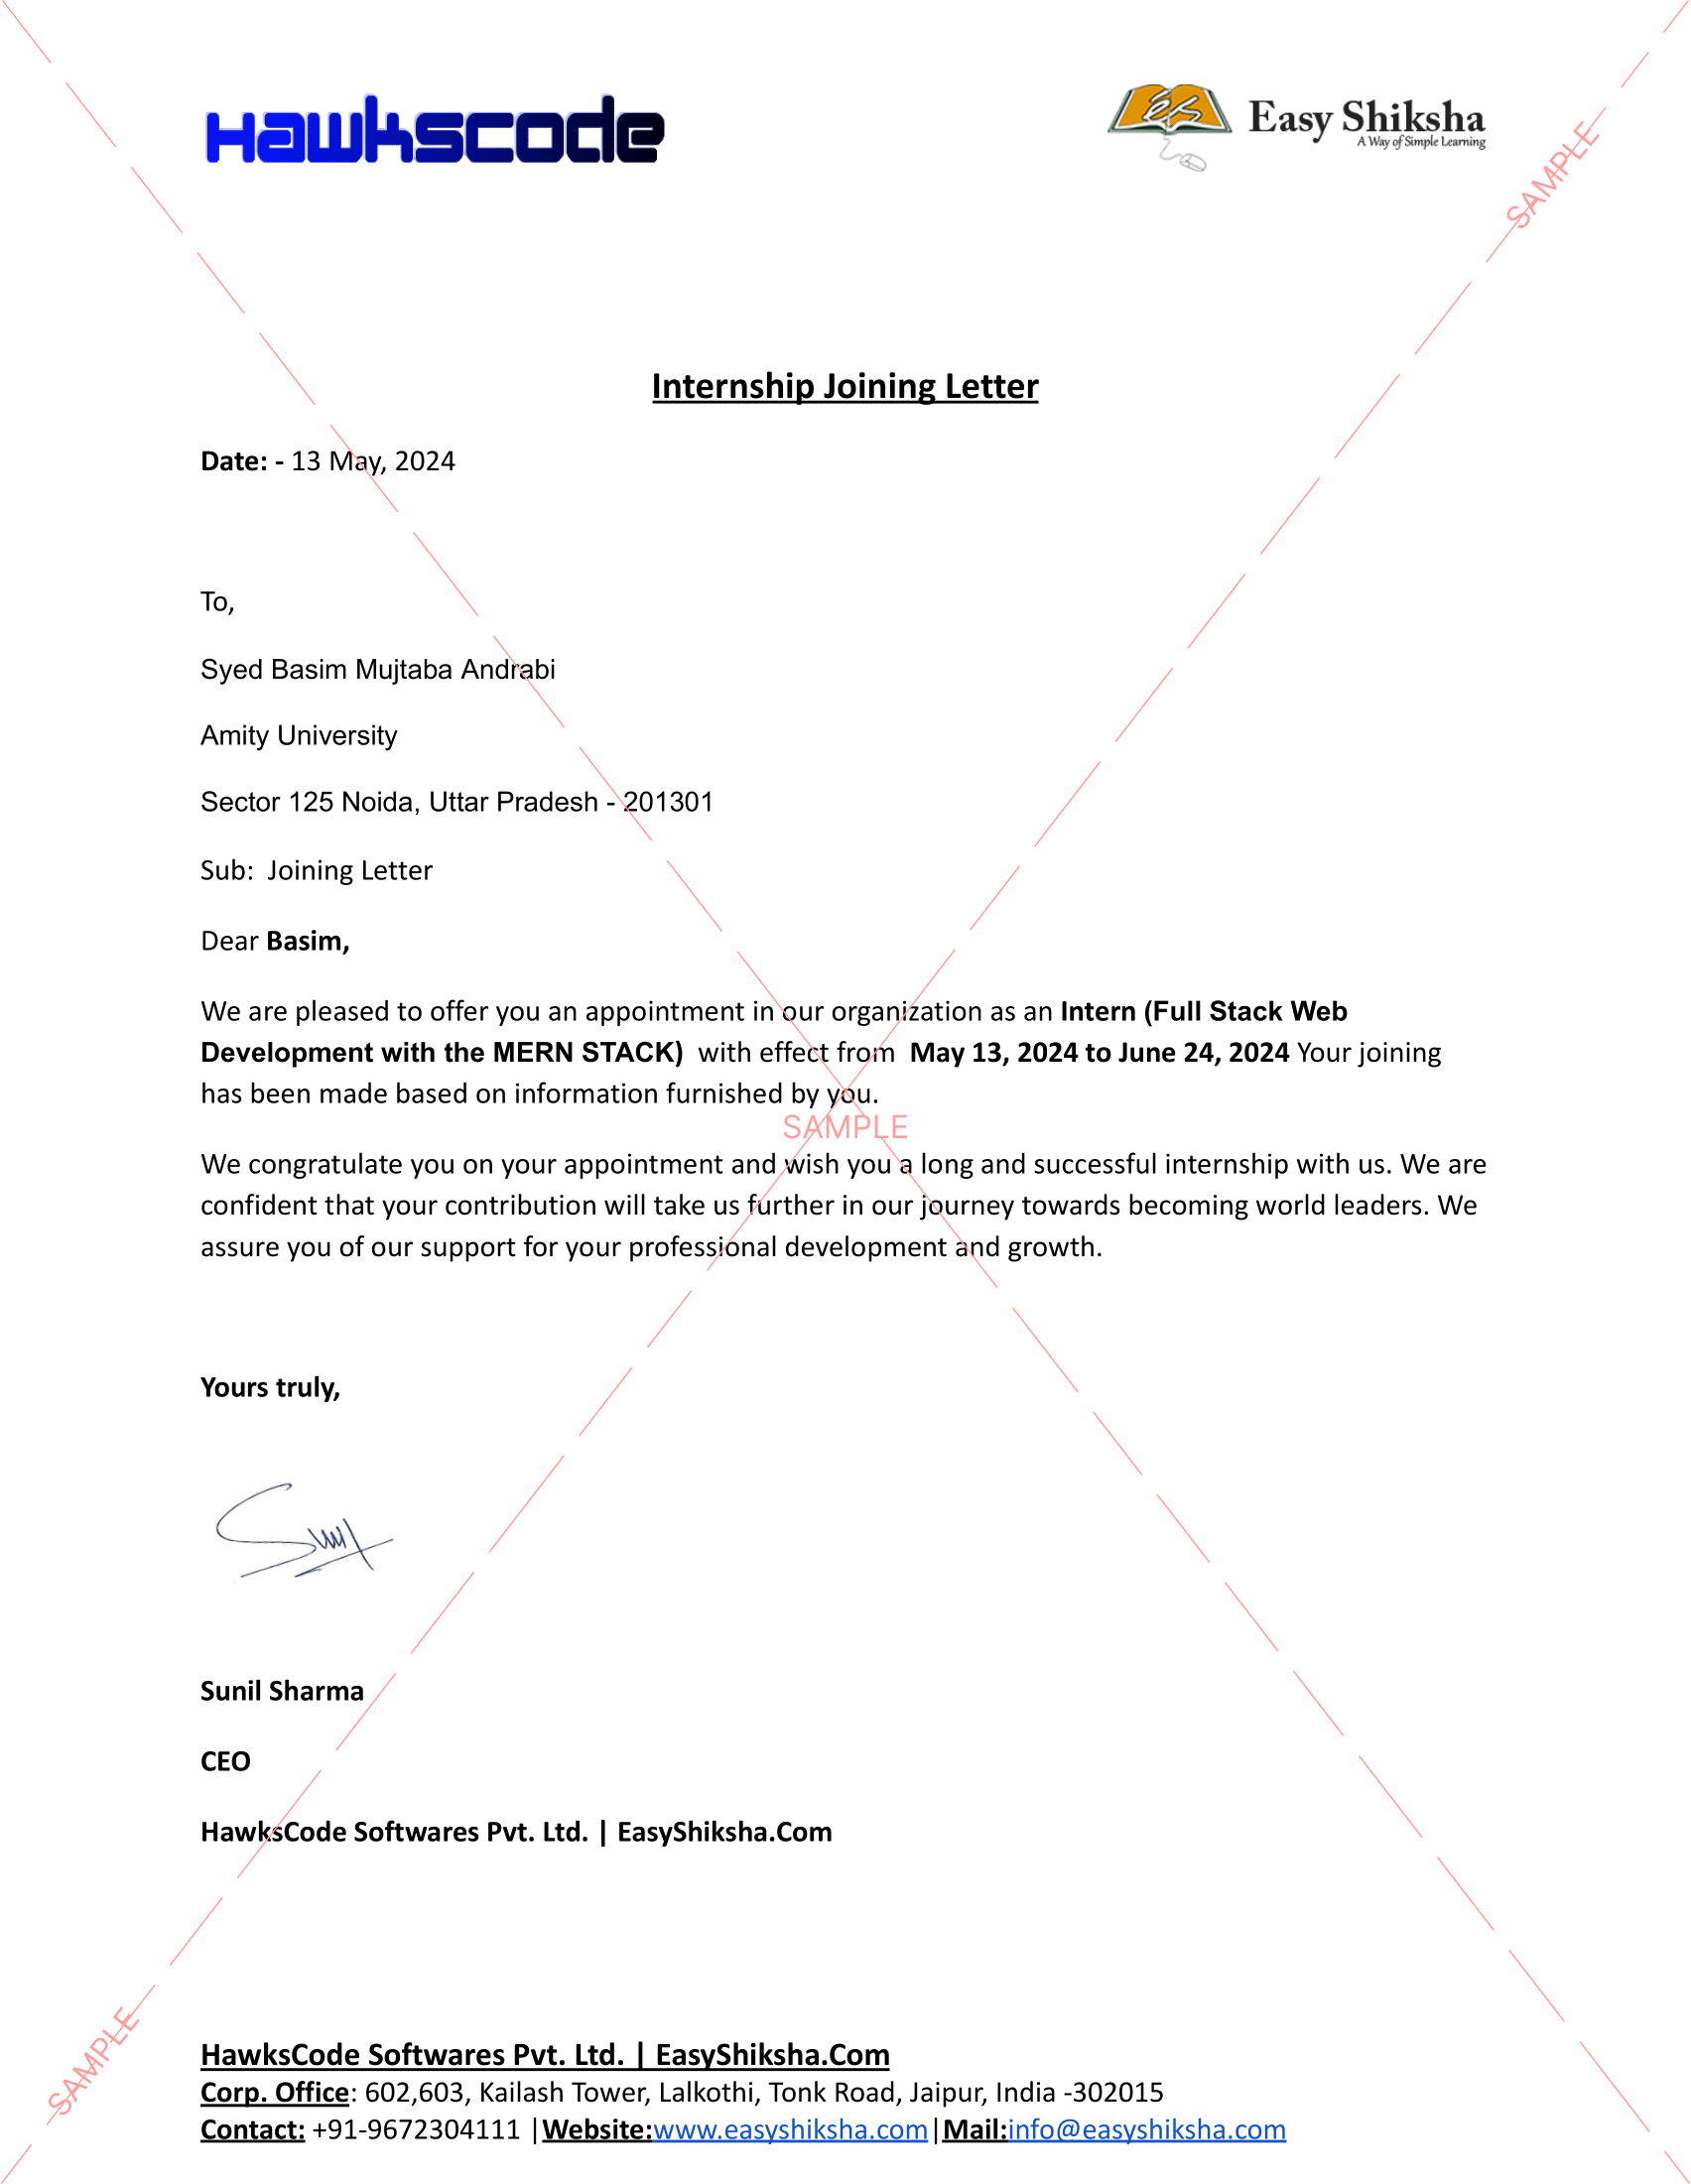
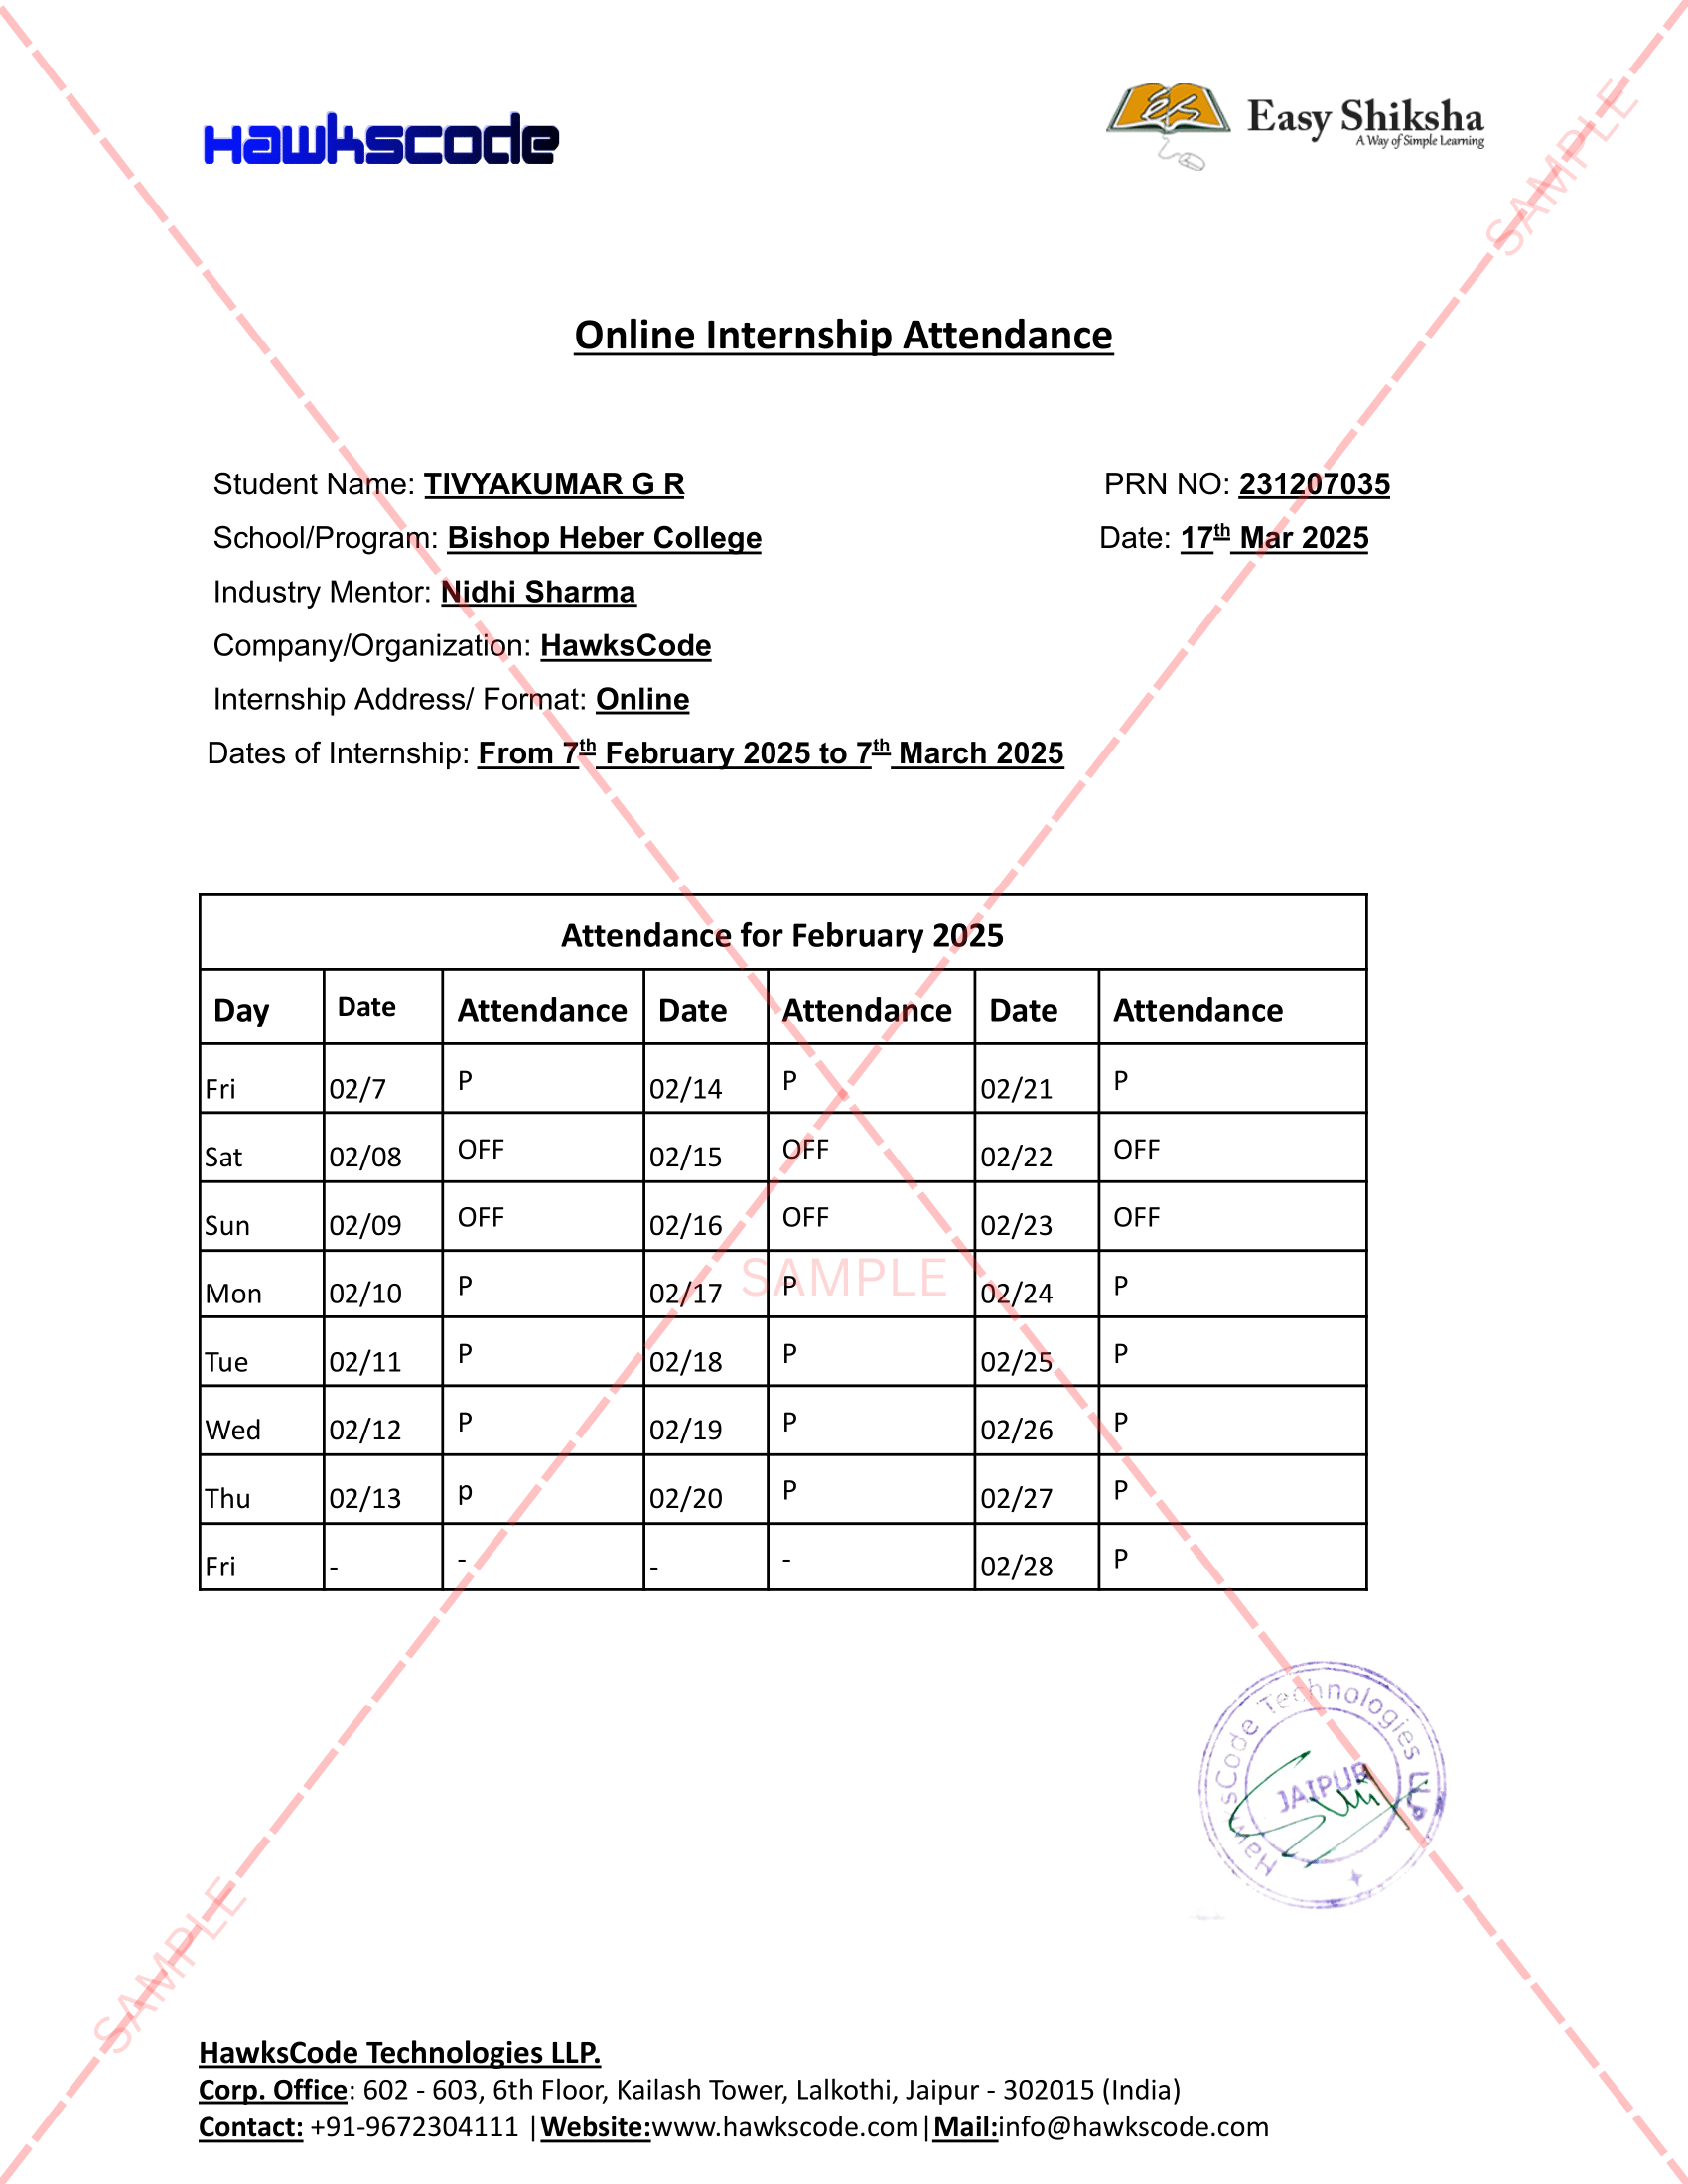
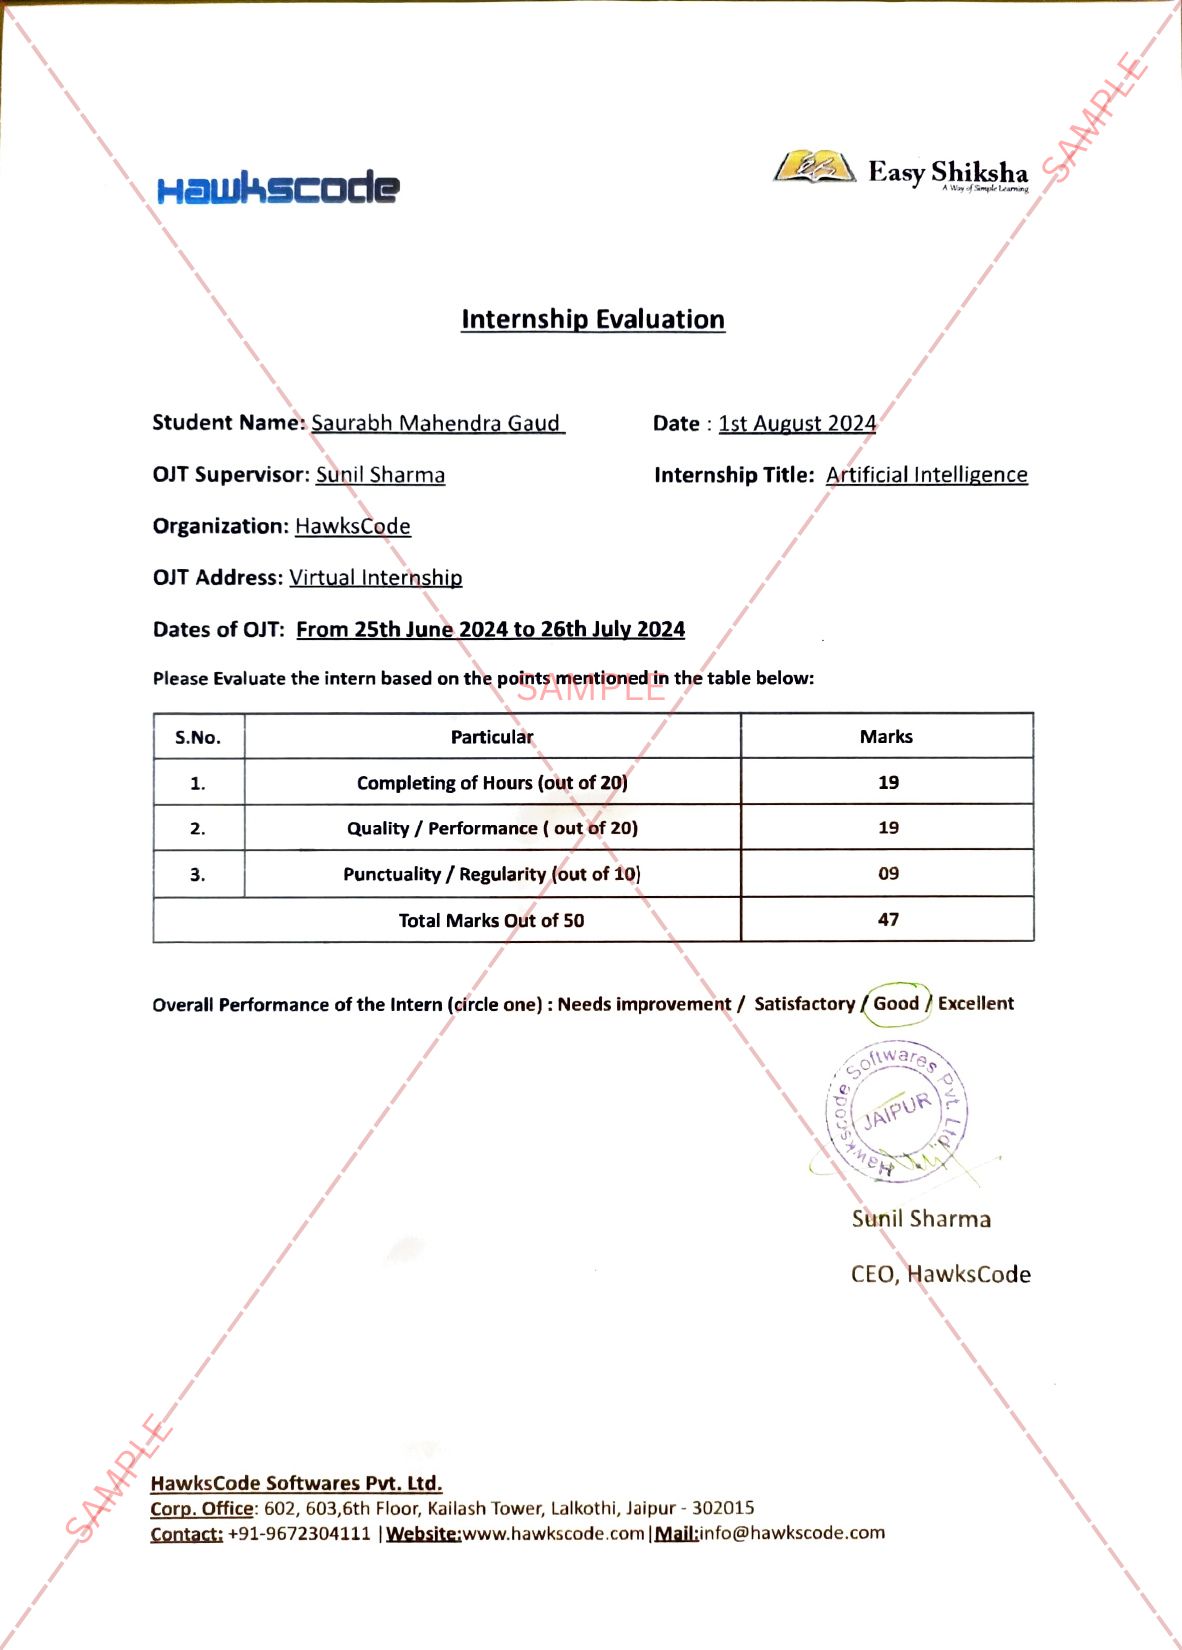
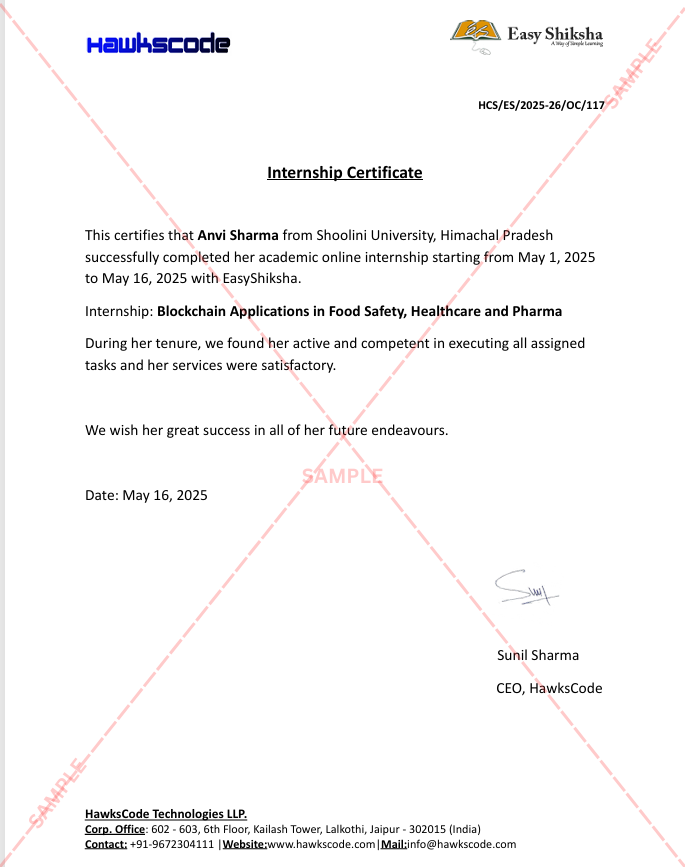
Sample EasyShiksha Internship Certificate

Internship Certificate

Your official offer letter and internship completion certificate โ€” real experience for your resume.

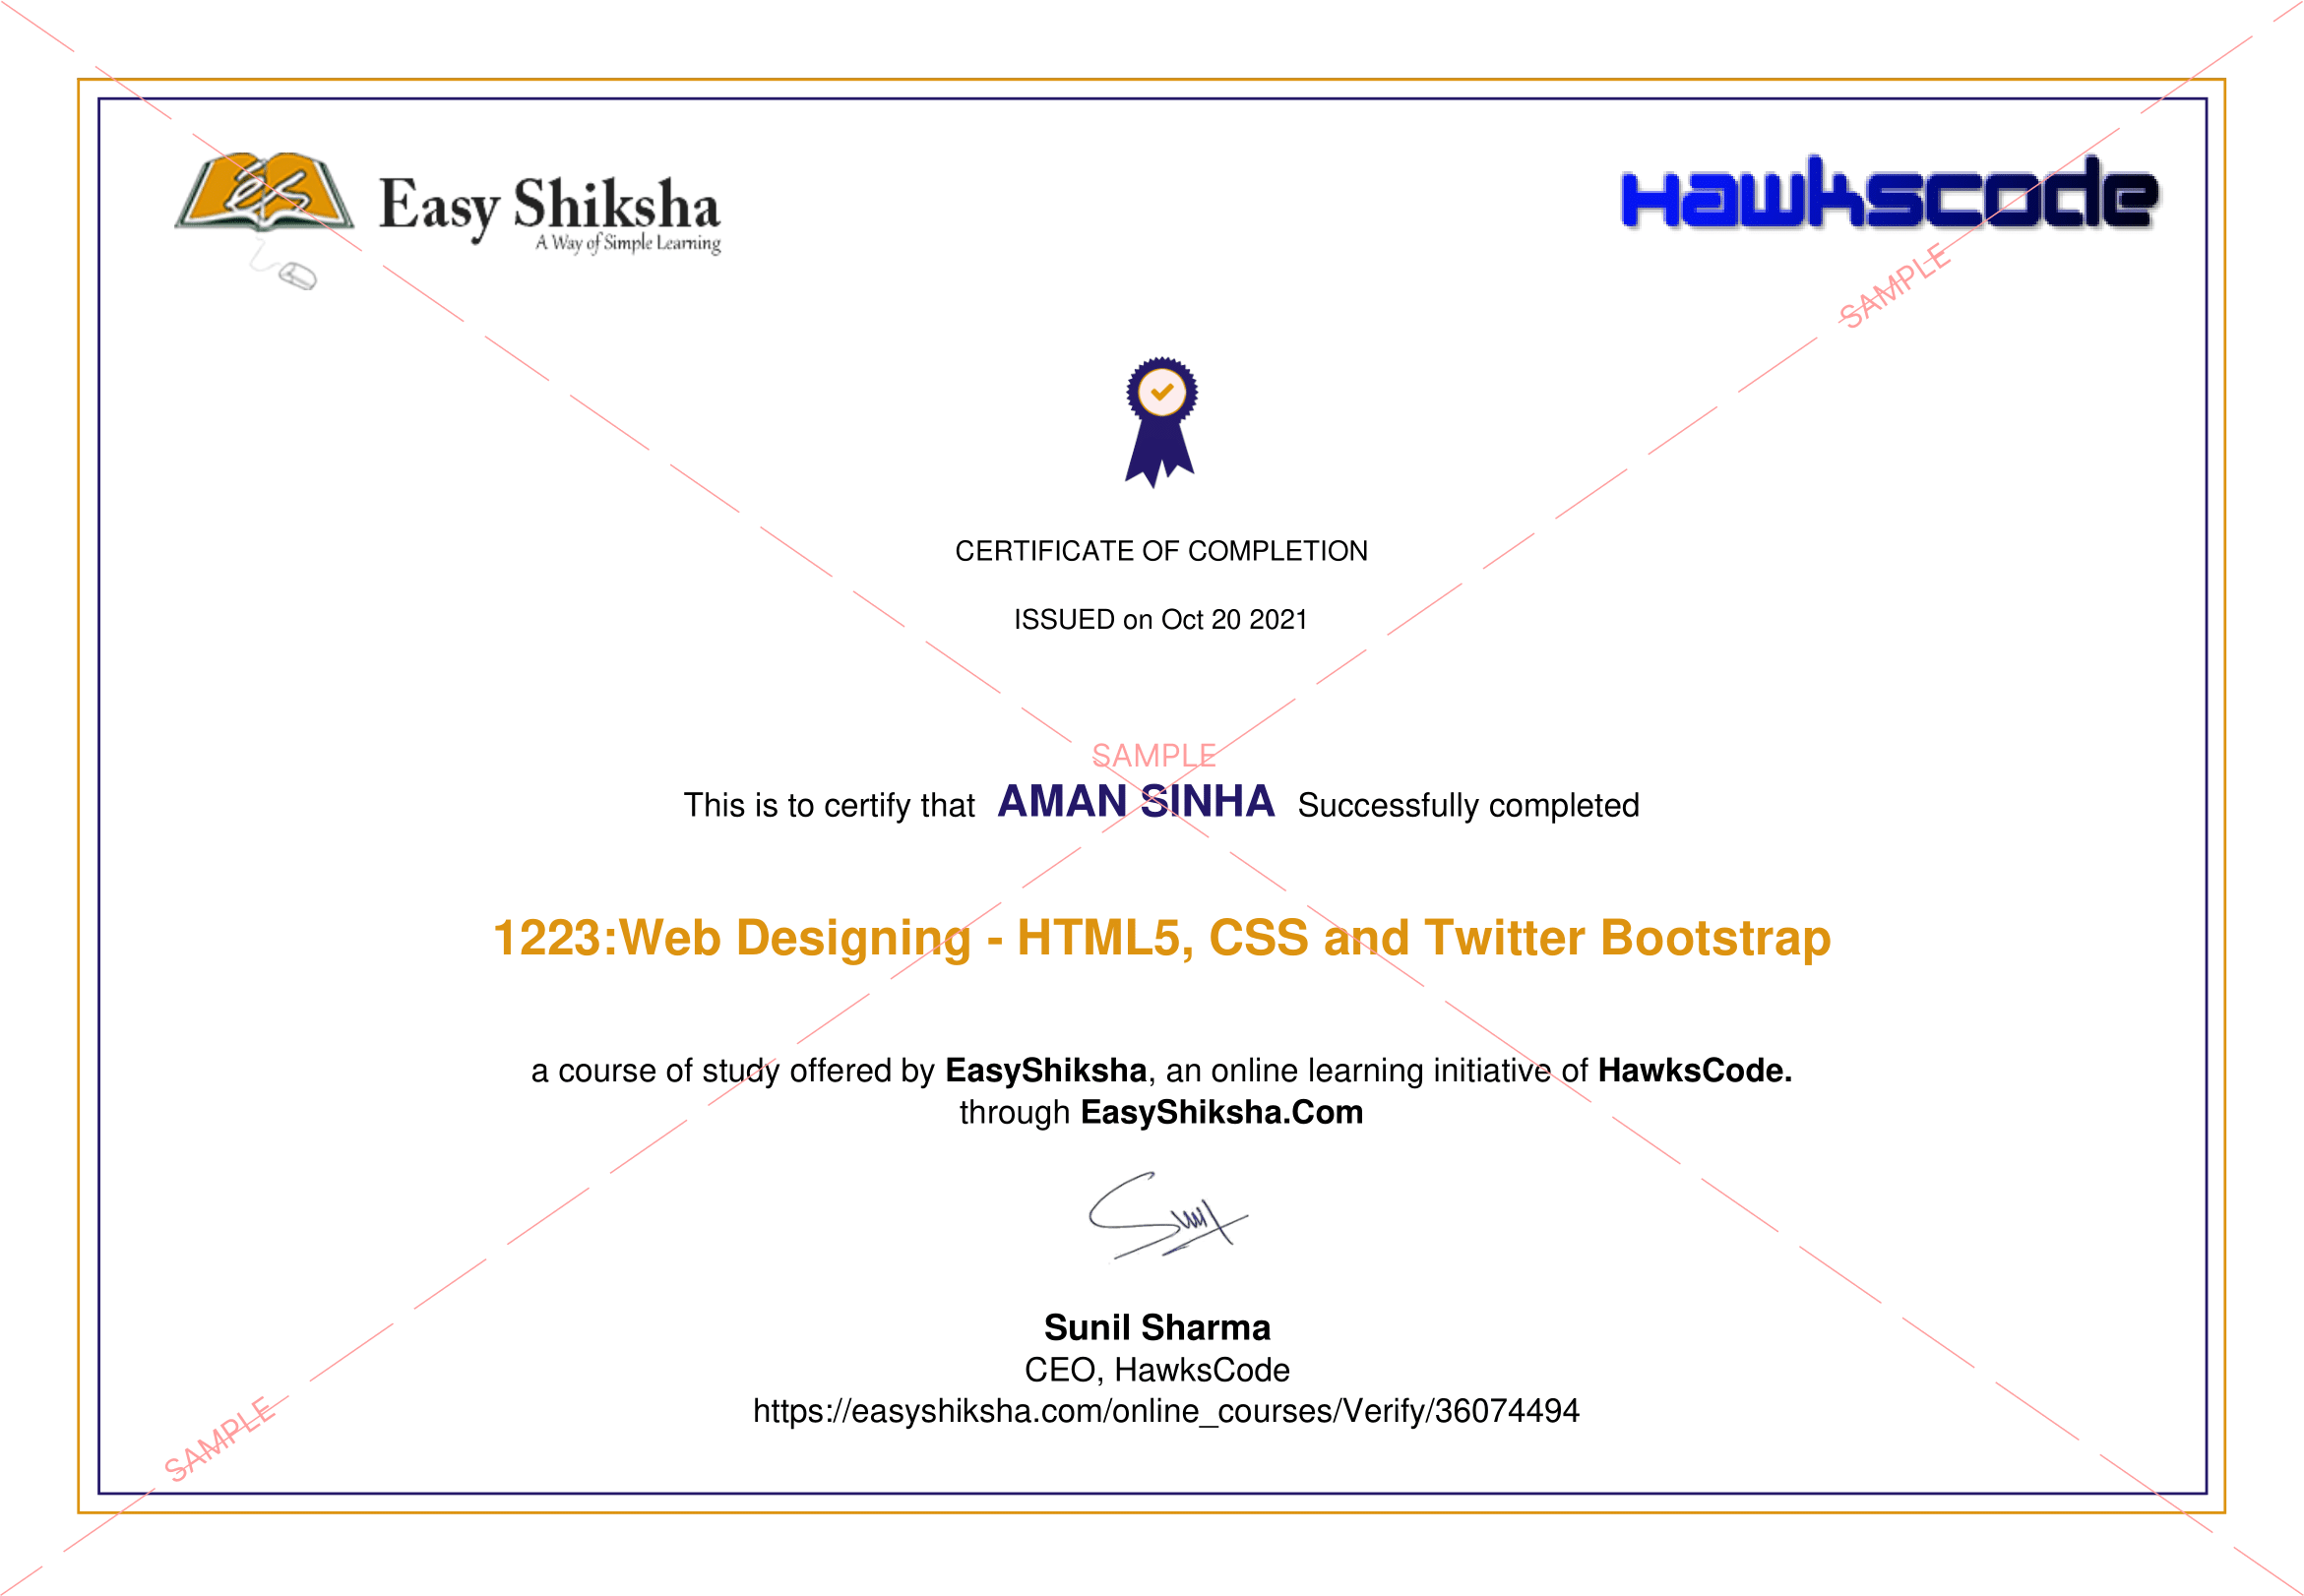
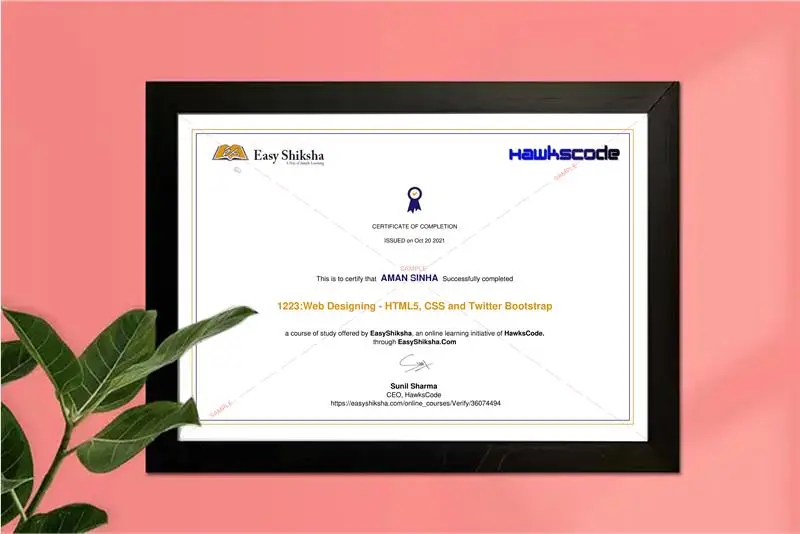
Sample EasyShiksha Course Completion Certificate

EasyShiksha Course Completion Certificate

Awarded on finishing Complete PIC Microcontroller Bootcamp curriculum, quizzes, and assignments.

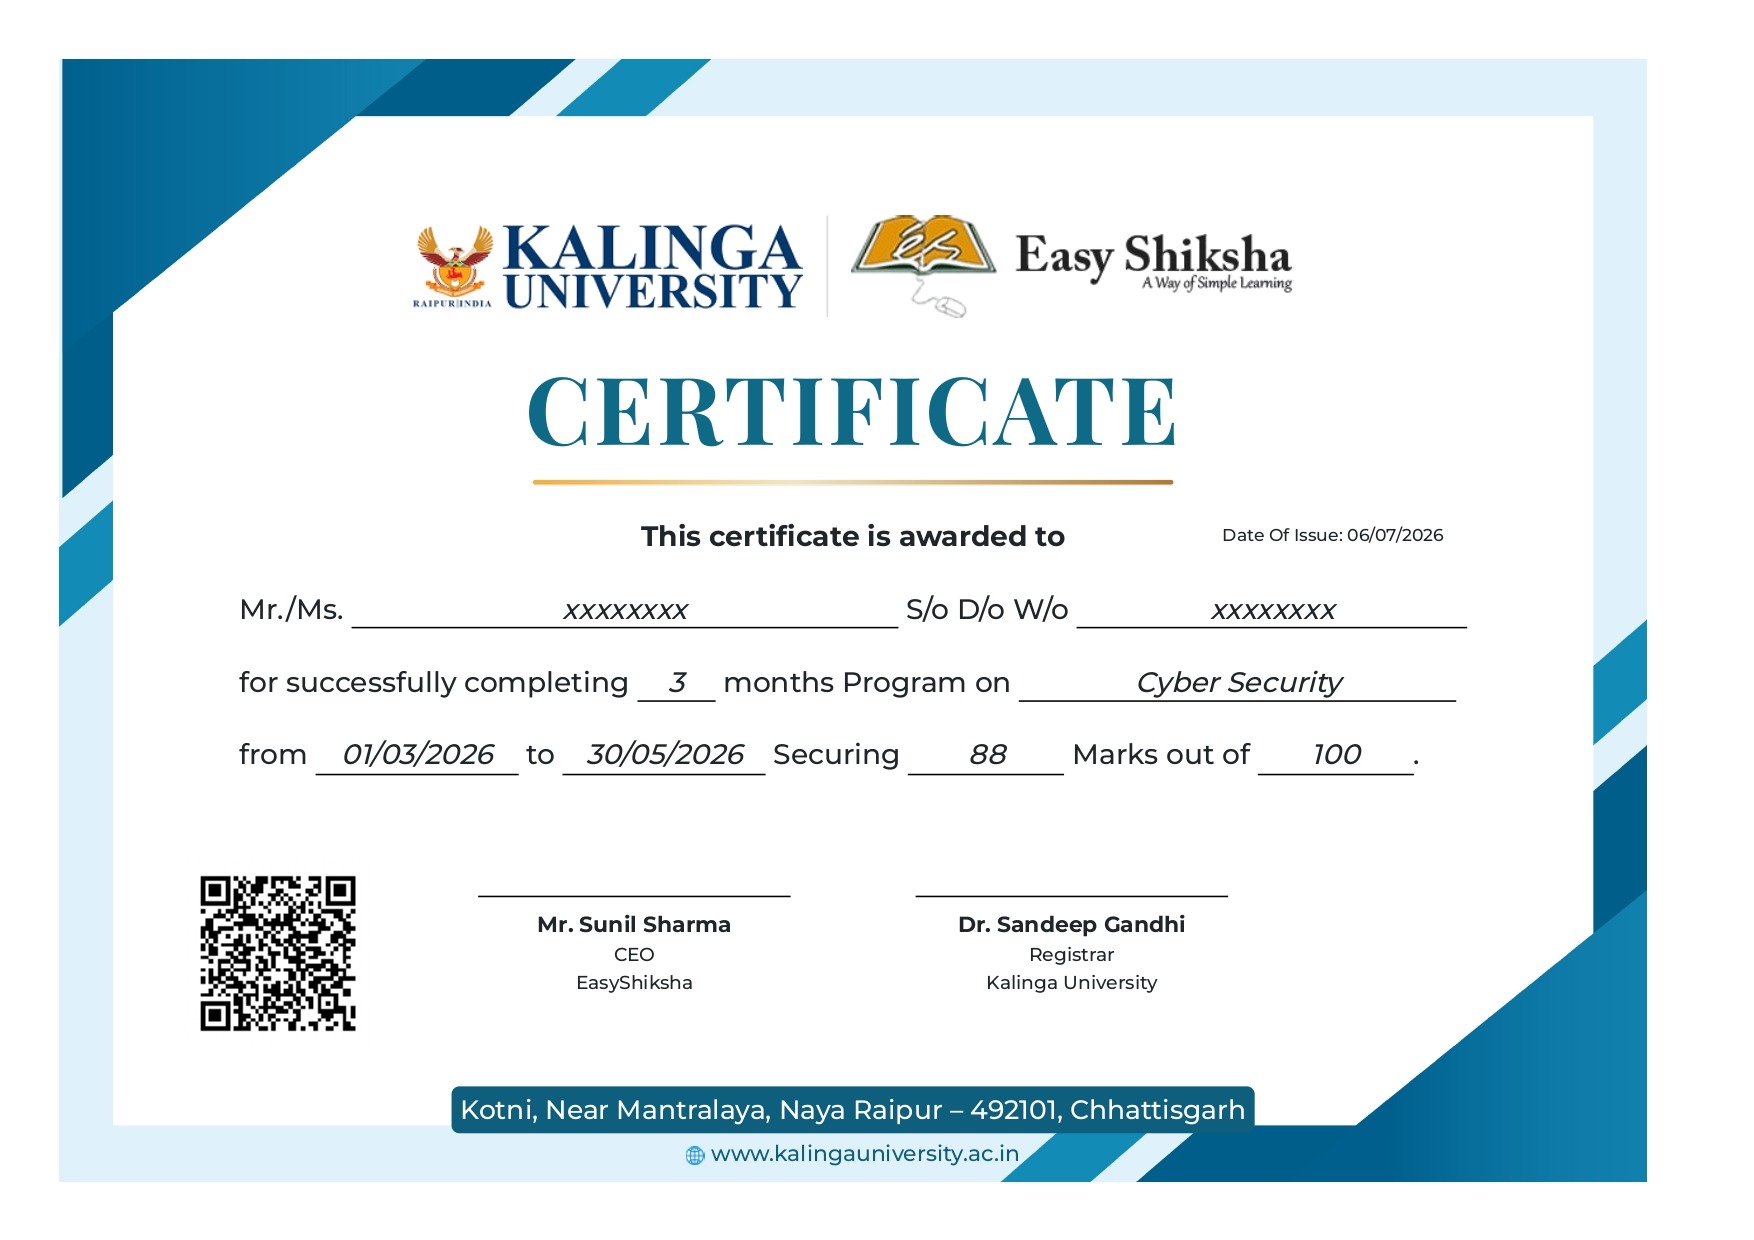
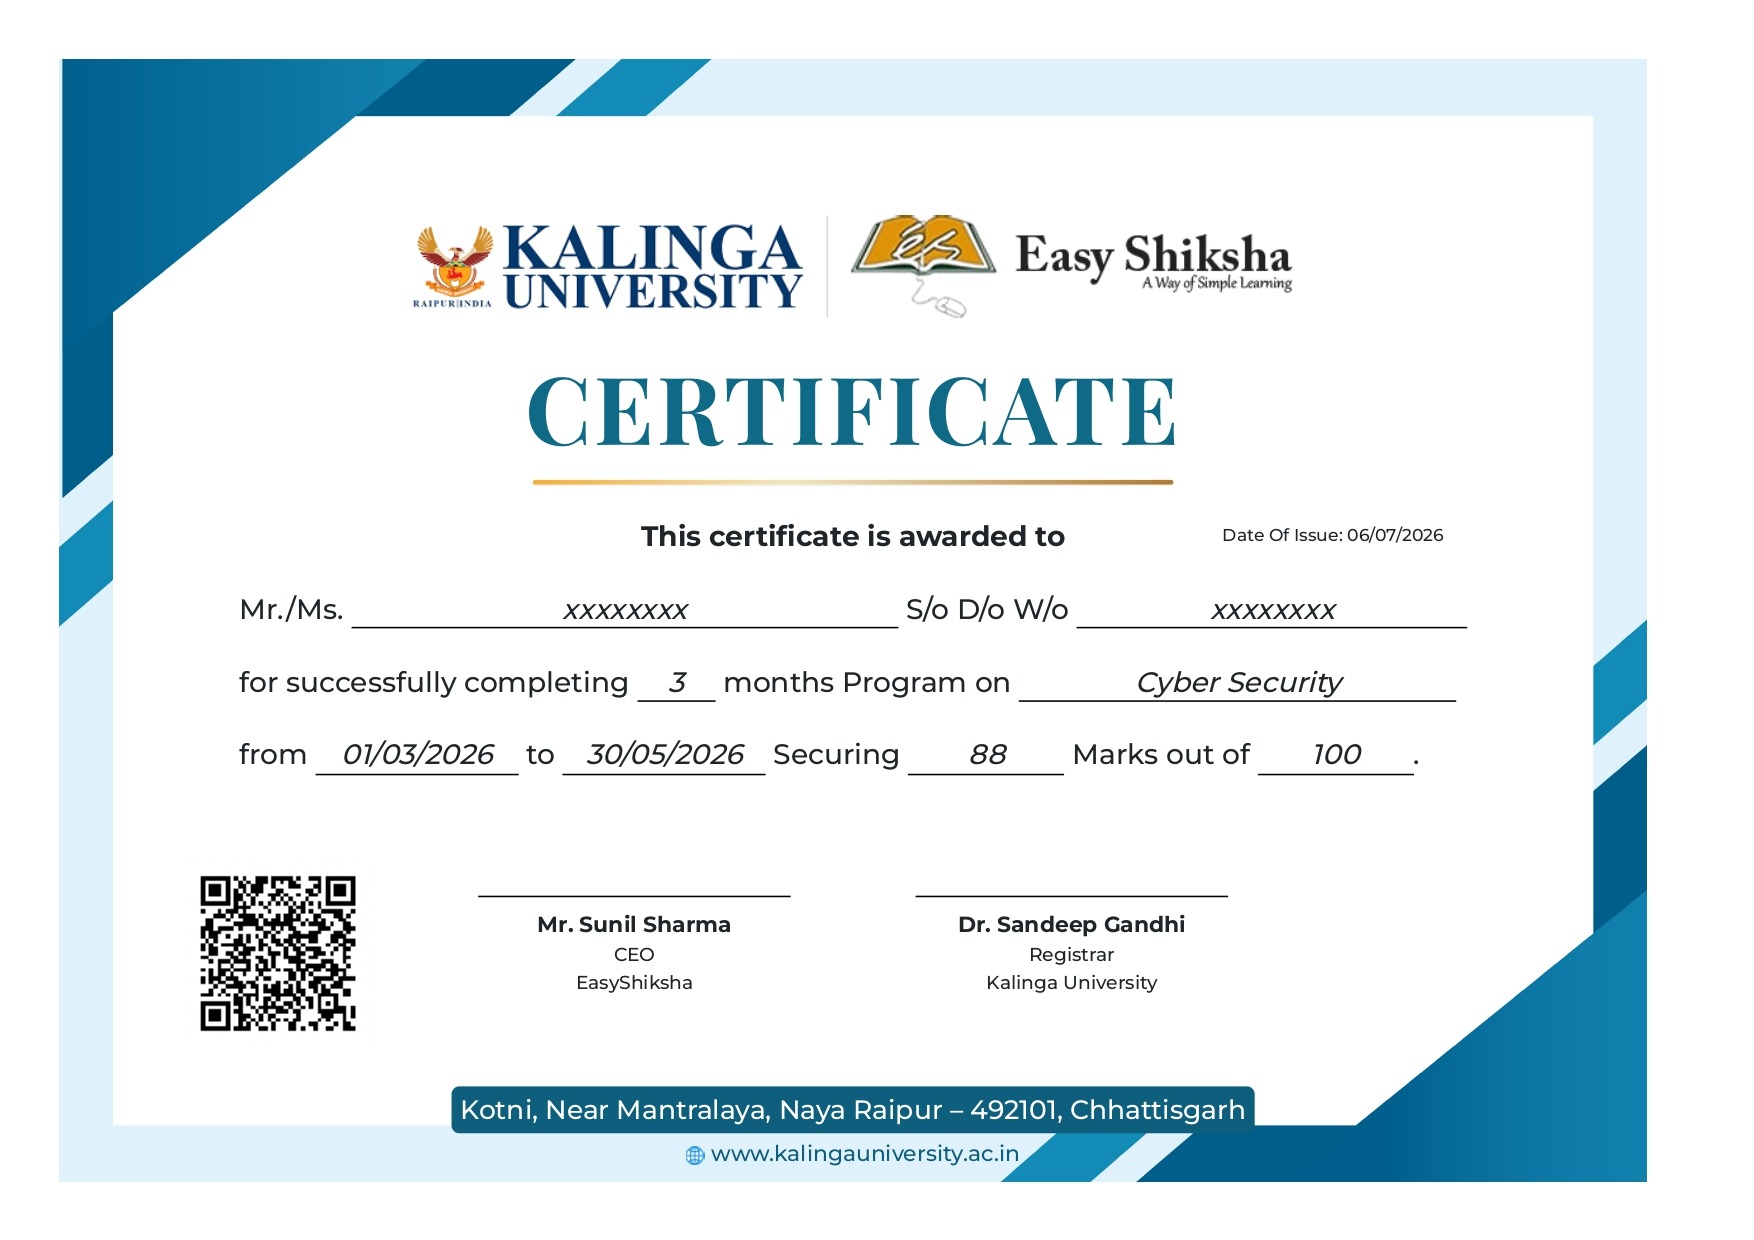
University Certificate
Kalinga University Certificate of Completion sample

Kalinga University Certificate of Completion

Signed and issued by Kalinga University, Raipur โ€” UGC-approved and NAAC B+ accredited .

What Makes This Programme Different

Why students choose this course & internship

Beginner Friendly

No prior experience needed. We start from absolute zero and take you to job-ready.

Practical Learning

Apply what you learn through guided real-world exercises and activities to build confidence.

EXCLUSIVE

Internship Included

Official offer letter + internship certificate โ€” something most expensive courses don't give.

Affordable Pricing

Premium content at a student-friendly price. Zero risk with a 30-day money-back guarantee.

Lifetime Access

Pay once, access forever. Revisit any lesson, any time, on any device โ€” no expiry.

Interview Prep

A dedicated module with real interview questions asked in top company placements.

Competitive Advantage

Why this course and internship stands out

See exactly what separates a university-certified EasyShiksha learner from everyone else scrolling through scattered tutorials.

Without This Programme

  • Watching scattered YouTube videos with no structure
  • No certificate โ€” nothing to show employers
  • No internship experience on resume
  • Wasting months without clear direction
  • Struggling to stand out in job applications

With EasyShiksha ร— Kalinga University

  • Structured, beginner-to-advanced learning path
  • University Certificate โ€” verified and shareable on LinkedIn
  • Real internship offer letter for your resume
  • Go from zero to job-ready in one programme
  • Resume-ready experience before graduation
Certificate vs Certificate

Why a university certificate changes how you're read

A platform certificate proves you finished a course. A university certificate signals your work was assessed and backed by an accredited academic institution.

What employers see
Course cert alone
+ University Certificate
Recognisable to placement cells
Sometimes
Consistently
Shareable on LinkedIn / resume
Yes
Yes โ€” with institutional letterhead
Signals independent assessment
Self-paced completion
Course + university-set criteria
Stands out in campus placements
Rarely
Frequently
Perfect Fit Check

This programme is perfect for

Whether you're starting from scratch or switching careers, this course and university certificate are designed with your success in mind.

๐ŸŽ“

College Students

Add a verified internship and university certificate to your resume before graduation.

Most Popular
๐ŸŒฑ

Complete Beginners

Zero experience? No problem. We start from absolute scratch and guide you step by step.

Beginner Friendly
๐Ÿ’ผ

Job Seekers

Get real internship experience and a university certificate as proof of your practical skills.

Career Boost
๐Ÿ”„

Career Switchers

Transitioning to tech? Build portfolio-worthy projects and gain the credential that opens doors.

Fast Track


Kalinga University
Kalinga University logo Kalinga University, Raipur
Your University Partner

Kalinga University, Raipur

Kalinga University private university in Raipur , Chhattisgarh 2013 . It is NAAC B+ accredited and holds approvals from AICTE, alongside a purpose-built campus spread across50+ acresโ€” offering undergraduate, postgraduate, and doctoral programmes across engineering, management, and the sciences.

2013Year established
NAACB+Accreditation grade
50 + acresRaipur campus
Course Content

Preview the lessons before enrolling

490 structured lessons , 2 of them free to preview right now.

490 Lessons2 Free Previews
โ–ถ
Introduction
FREE
โ–ถ
Overview and The Software to be used
FREE
Unlock 488 more lessons + Internship AccessFull course + real internship โ€” affordable one-time access
Go to Class Room
๐Ÿ”’
How to increase the font size in the Programming environment
๐Ÿ”’
Why C and Basic Program Structure
๐Ÿ”’
Variables
๐Ÿ”’
Statement and Operators
๐Ÿ”’
LOOP Statements
๐Ÿ”’
Conditions Using If and Switch
๐Ÿ”’
Numbering System
๐Ÿ”’
Using Functions
๐Ÿ”’
Using Operators
๐Ÿ”’
16 End
๐Ÿ”’
Download and Install Microsoft Visual Studio
๐Ÿ”’
Basics + Create Your First Project
๐Ÿ”’
Basic Input and Output using Console Methods
๐Ÿ”’
Code Your First Project
๐Ÿ”’
String Arguments Explained
๐Ÿ”’
Syntax Basics
๐Ÿ”’
Data Types
๐Ÿ”’
Operators
๐Ÿ”’
Operators Example
๐Ÿ”’
Practice Example
๐Ÿ”’
If Else + Nested If
๐Ÿ”’
If Statement
๐Ÿ”’
Decision Making using Switch Case
๐Ÿ”’
While Loop + Do While
๐Ÿ”’
For Loop
๐Ÿ”’
32 Introduction
๐Ÿ”’
Who We Are
๐Ÿ”’
How to install Proteous Professional
๐Ÿ”’
How to Install MikroC Pro for PIC Programming
๐Ÿ”’
Overview and the software to be used
๐Ÿ”’
Compilation Process and Your First C Project
๐Ÿ”’
How to increase the font size in the Programming Environment
๐Ÿ”’
Why C and Basic Program Structure
๐Ÿ”’
Variables
๐Ÿ”’
Statements and Operators
๐Ÿ”’
LOOP Statements
๐Ÿ”’
Conditions if and Switch
๐Ÿ”’
Numbering System
๐Ÿ”’
Using Operators
๐Ÿ”’
Using Functions
๐Ÿ”’
Digital Inputs and Delay Loops
๐Ÿ”’
First Project in Proteus
๐Ÿ”’
First Project in MikroC
๐Ÿ”’
How to Deal with PIC Ports + First Code
๐Ÿ”’
Necessary Connections
๐Ÿ”’
Simple LED example to get things on the right track
๐Ÿ”’
Flasher Circuit PIC Microcontroller
๐Ÿ”’
Lighting LED Follower Example
๐Ÿ”’
Control LED Using Push Buttons
๐Ÿ”’
Controlling Seven Segment using BCD Counter PIC Microcontroller
๐Ÿ”’
Controlling LCD using PIC Microcontroller
๐Ÿ”’
Display and Move Text on LCD
๐Ÿ”’
Stepper Motor Control
๐Ÿ”’
Dot Matrix Control
๐Ÿ”’
Keypad Interface and control with PIC Microcontroller
๐Ÿ”’
PIC Manufacture Microship Company
๐Ÿ”’
Programming PIC and Circuit Prototyping
๐Ÿ”’
PIC Architecture and PIC Families
๐Ÿ”’
Harvard Architecture vs Von Neoman Architecture
๐Ÿ”’
PIC16F84 Microcontrollers Explained
๐Ÿ”’
Single Word Instructions
๐Ÿ”’
System Reset
๐Ÿ”’
Ports
๐Ÿ”’
PIC Architecture 2 Ports and Registers
๐Ÿ”’
Status Register
๐Ÿ”’
Option Register
๐Ÿ”’
Banking Mechanism
๐Ÿ”’
SFRs and GPRs
๐Ÿ”’
Memory Organization
๐Ÿ”’
Analog To Digital Conversion
๐Ÿ”’
ADC Module in PIC16F877A
๐Ÿ”’
ADC Module Configuration Bits and Example
๐Ÿ”’
Interrupts and External Interrupt Source
๐Ÿ”’
PortB Line Change Interrupt Source
๐Ÿ”’
EEPROM Data Write Interrupt
๐Ÿ”’
Interrupt Handlers and INTCON Register
๐Ÿ”’
Option Register
๐Ÿ”’
Programming the External Interrupt RB0 Example
๐Ÿ”’
PortB 4 7 Status Change Interrupt
๐Ÿ”’
RB0 and RB4-7 Interrupt Example
๐Ÿ”’
Serial Communication Introduction and Basics
๐Ÿ”’
Synchronous Serial Transmission and RS232
๐Ÿ”’
Essential Concepts in Serial Communication
๐Ÿ”’
PIC TO PIC And PIC TO PC Communication
๐Ÿ”’
Experiment #9 Analog Digital Conversion
๐Ÿ”’
Experiment #10 Unipolar Stepper Motor Control
๐Ÿ”’
Experiment #11 Dot-Matrix Display
๐Ÿ”’
Experiment #12 Serial Interface with PIC Microcontroller
๐Ÿ”’
96 Introduction
๐Ÿ”’
Voltage Current and Resistance
๐Ÿ”’
Types of Current
๐Ÿ”’
Types of Circuits
๐Ÿ”’
Volt Ohm Meter Basics
๐Ÿ”’
Measuring Voltage
๐Ÿ”’
Measuring Current
๐Ÿ”’
Measuring Currents - Lab Experiment Explained
๐Ÿ”’
Measuring Resistance
๐Ÿ”’
Circuit Diagram Basics and Basic Symbols
๐Ÿ”’
Introduction To Resistor and Color Band Coding
๐Ÿ”’
Power Dissipation and Parallel and Series Resistors
๐Ÿ”’
Ohm_s Law
๐Ÿ”’
Introduction To Capacitors
๐Ÿ”’
Capacitors Behavior and Series and Parallel
๐Ÿ”’
Introduction to Inductors
๐Ÿ”’
Introduction to Diode Zener and LED
๐Ÿ”’
Introduction to Transistors
๐Ÿ”’
114 Introduction
๐Ÿ”’
Who We Are
๐Ÿ”’
Interrupts and External Interrupt Source
๐Ÿ”’
PortB Line Change Interrupt Source
๐Ÿ”’
EEPROM Data Write Interrupt
๐Ÿ”’
Interrupt Handlers and INTCON Register
๐Ÿ”’
Option Register
๐Ÿ”’
Programming the External Interrupt RB0 Example
๐Ÿ”’
PortB 4 7 Status Change Interrupt
๐Ÿ”’
RB0 and RB4-7 Interrupt Example
๐Ÿ”’
Serial Communication Introduction and Basics
๐Ÿ”’
Synchronous Serial Transmission and RS232
๐Ÿ”’
PIC TO PIC And PIC TO PC Communication
๐Ÿ”’
Serial Communication Example PIC TO PC
๐Ÿ”’
Timers and Counters
๐Ÿ”’
Timer0 Interrupt
๐Ÿ”’
Delay Using Timer0
๐Ÿ”’
Timer0 Interrupt Programming Delay Loops
๐Ÿ”’
Interrupt Driven Timers
๐Ÿ”’
Timers0 as a Counter
๐Ÿ”’
134 End of Course
๐Ÿ”’
Download and Install MikroC Software
๐Ÿ”’
Download and Install Proteus Software
๐Ÿ”’
137 Introduction
๐Ÿ”’
What is I2C
๐Ÿ”’
Things You Need to Know about I2C
๐Ÿ”’
Advantages to I2C
๐Ÿ”’
Disadvantages to I2C
๐Ÿ”’
I2C Bus Operation
๐Ÿ”’
Operation Explained in More Details
๐Ÿ”’
I2C Pins in Arduino
๐Ÿ”’
Arduino Wire Library I2C Functions
๐Ÿ”’
Arduino to Arduino I2C Example Circuit Design
๐Ÿ”’
Arduino to Arduino I2C Example Coding
๐Ÿ”’
Arduino to DS1307 Time and Date Module Circuit Design
๐Ÿ”’
I2C Library Routines
๐Ÿ”’
Circuit Design for I2C Testing
๐Ÿ”’
Coding Simple Example
๐Ÿ”’
Reading Data from DS1307 time and Date IC
๐Ÿ”’
What is SPI
๐Ÿ”’
SPI Working Principle
๐Ÿ”’
SPI Library in MikroC Pro IDE
๐Ÿ”’
Circuit Design
๐Ÿ”’
Coding
๐Ÿ”’
Arduino SPI Pins
๐Ÿ”’
Arduino SPI Library
๐Ÿ”’
Circuit Design Arduino to Arduino SPI Communication
๐Ÿ”’
Coding Master
๐Ÿ”’
Coding Slave
๐Ÿ”’
Introduction to the USB World
๐Ÿ”’
Advantages of USB Communication
๐Ÿ”’
USB Pin-out Port Wiring
๐Ÿ”’
USB Transfer Speeds
๐Ÿ”’
USB Device Classes
๐Ÿ”’
Introduction to Descriptors
๐Ÿ”’
Creating a descriptor file in MikroC
๐Ÿ”’
Creating a descriptor file in MikroC - Practical
๐Ÿ”’
USB Libraries HID Enable
๐Ÿ”’
USB RAM
๐Ÿ”’
USB Functions
๐Ÿ”’
Circuit Design for First Example
๐Ÿ”’
Installing the Virtual USB Port Feature to enable Simulation
๐Ÿ”’
First Example Send and Receive Data
๐Ÿ”’
Second Example Send Characters and Check the incoming Data
๐Ÿ”’
Third Example Turn Leds On and Off via USB
๐Ÿ”’
Forth Example Reading Input - Button Press
๐Ÿ”’
Burning the Code to PIC using A Programmer
๐Ÿ”’
MikroC and Ql2006 Right Configuration for the Code file
๐Ÿ”’
DEVICE DRIVERS FOR USB interfacing with pic microcontroller
๐Ÿ”’
Practical Circuit Assembly
๐Ÿ”’
What is a GUI
๐Ÿ”’
Microsoft Visual Studio
๐Ÿ”’
Proteus Virtual USB Installation
๐Ÿ”’
Different Communication methods that Can be Used
๐Ÿ”’
What is Serial Communication and RS232
๐Ÿ”’
How To Create Your First GUI Project Quick Intro
๐Ÿ”’
How to Create RS232 Serial Interfacing Circuit Board
๐Ÿ”’
Circuit Design for Two Leds Controlled by PIC Microcontroller
๐Ÿ”’
Code Your Microcontroller to Send and Receive Serial Data
๐Ÿ”’
Create Your First GUI to Control Two Leds
๐Ÿ”’
Control PIC Microcontroller using GUI
๐Ÿ”’
Download and Install Proteus Software
๐Ÿ”’
Download and Install MikroC Software
๐Ÿ”’
Download and Install Arduino Software
๐Ÿ”’
Download and Install Fritzing Software
๐Ÿ”’
Download and Install Microsoft Visual Studio
๐Ÿ”’
Who We Are
๐Ÿ”’
201 Introduction
๐Ÿ”’
Hardware and Software Requirements
๐Ÿ”’
Different Types of Detectors
๐Ÿ”’
Different Types of Flame Detectors
๐Ÿ”’
Working Principle behind Flame Detector
๐Ÿ”’
Download and Install Proteus Software
๐Ÿ”’
Circuit Connection
๐Ÿ”’
IR Module
๐Ÿ”’
Download and Install MikroC Software
๐Ÿ”’
Coding
๐Ÿ”’
Download and Install Altium
๐Ÿ”’
Install Altium
๐Ÿ”’
PCB Design
๐Ÿ”’
Finishing the PCB
๐Ÿ”’
215 Introduction
๐Ÿ”’
Educational Engineering Team - Who we are
๐Ÿ”’
Hardware and Software Requirements
๐Ÿ”’
What is PIC Microcontroller
๐Ÿ”’
What is LCD Display
๐Ÿ”’
What is PICSimlab Alternative Simulation Software
๐Ÿ”’
LCD Library and Routines
๐Ÿ”’
LCD Initialization
๐Ÿ”’
LCD Output to Display Text on LCD
๐Ÿ”’
LCD Character Output Routine
๐Ÿ”’
LCD Commands and how to deal with them
๐Ÿ”’
How to Use PICSimLab Simulation Boards with MikroC
๐Ÿ”’
LCD Simulation
๐Ÿ”’
LCD Shift Text
๐Ÿ”’
What is MikroC Pro and How to Download and Install it
๐Ÿ”’
What is Proteus Professional Download and Install Part1
๐Ÿ”’
Who We Are
๐Ÿ”’
232 Introduction
๐Ÿ”’
Quick Review
๐Ÿ”’
Software for Coding and Simulation
๐Ÿ”’
Serial Port on PIC Microcontroller
๐Ÿ”’
Schematic Diagram
๐Ÿ”’
More about Schematic Diagram
๐Ÿ”’
Programming Code
๐Ÿ”’
Programming Code Explained
๐Ÿ”’
Results and Project Testing
๐Ÿ”’
241 The End
๐Ÿ”’
Who We Are
๐Ÿ”’
Introduction
๐Ÿ”’
Who We Are
๐Ÿ”’
Hardware and Software Requirements
๐Ÿ”’
Concept Behind This Project
๐Ÿ”’
What is DTMF
๐Ÿ”’
Basic Layout and Function Explained
๐Ÿ”’
DTMF Decoder
๐Ÿ”’
DTMF Decoder Circuit Explained
๐Ÿ”’
Headphone Jack Explained in Details
๐Ÿ”’
DTMF Circuit Schematic
๐Ÿ”’
Circuit Design for PIC Microcontroller
๐Ÿ”’
C Coding and Simulation for DTMF Project
๐Ÿ”’
Make DTMF Decoder Module PCB
๐Ÿ”’
DTMF Decoder Practical Example
๐Ÿ”’
Introduction
๐Ÿ”’
Who We Are
๐Ÿ”’
How to install Proteous Professional
๐Ÿ”’
How to Install MikroC Pro for PIC Programming
๐Ÿ”’
Overview and the software to be used
๐Ÿ”’
Compilation Process and Your First C Project
๐Ÿ”’
How to increase the font size in the Programming environment
๐Ÿ”’
Why C and Basic Program Structure
๐Ÿ”’
Variables
๐Ÿ”’
Statements and Operations
๐Ÿ”’
LOOP Statements
๐Ÿ”’
Conditions If and Switch
๐Ÿ”’
Numbering System
๐Ÿ”’
Using Operators
๐Ÿ”’
Using Functions
๐Ÿ”’
Digital Inputs and Delay Loops
๐Ÿ”’
PIC Manufacturer Microchip Company
๐Ÿ”’
Programming PIC and Circuit Prototyping
๐Ÿ”’
PIC Architecture and PIC Families
๐Ÿ”’
Harvard Architecture vs Von Neoman Architecture
๐Ÿ”’
PIC16F84 Microcontrollers Explained
๐Ÿ”’
Single Word Instruction
๐Ÿ”’
Pin Description and Oscillator Types
๐Ÿ”’
System Reset
๐Ÿ”’
Ports
๐Ÿ”’
PIC Architecture 2 Ports and Registries
๐Ÿ”’
Status Register
๐Ÿ”’
Option Register
๐Ÿ”’
Banking Mechanism
๐Ÿ”’
SFRs and GPRs
๐Ÿ”’
Memory Organization
๐Ÿ”’
First Project in Proteus
๐Ÿ”’
First Project MikroC
๐Ÿ”’
How to Deal with PIC Ports + First Code
๐Ÿ”’
Necessary Connections
๐Ÿ”’
Simple LED Example to get things on the right track
๐Ÿ”’
Flasher circuit PIC Microcontroller
๐Ÿ”’
Lighting LED Follower Example
๐Ÿ”’
Control LED using Push Button
๐Ÿ”’
Controlling Seven Segment using BCD Counter PIC Microcontroller
๐Ÿ”’
Controlling LCD using PIC Microcontroller
๐Ÿ”’
Display and Move Text on LCD
๐Ÿ”’
Stepper Motor Control
๐Ÿ”’
Dot Matrix Control
๐Ÿ”’
Keypad Interface and control with PIC Microcontroller
๐Ÿ”’
PIC Programming Options
๐Ÿ”’
Experiment #1 Introduction to Software Tools MikroC, PROTEUS, and QL-2006
๐Ÿ”’
Experiment #2 Introduction to PIC16F84A
๐Ÿ”’
Experiment #3 Introduction to MikroC Language
๐Ÿ”’
Experiment #4 Some Logic Functions Design
๐Ÿ”’
Experiment #5 Delay Loops Applications Flasher & Counter & Push Buttons
๐Ÿ”’
Experiment #6 7 segment Interface with PIC Microcontroller & Counter Application
๐Ÿ”’
Experiment #7 LCD Interface with PIC Microcontroller
๐Ÿ”’
Experiment #8 Keypad Interface with PIC
๐Ÿ”’
Experiment #9 Analog Digital Conversion
๐Ÿ”’
Experiment #10 Unipolar Stepper Motor Control
๐Ÿ”’
Experiment #11 Dot-Matrix Display
๐Ÿ”’
Experiment #12 Serial Interface with PIC Microcontroller
๐Ÿ”’
Analog To Digital Conversion
๐Ÿ”’
ADC Module in PIC16F877A
๐Ÿ”’
ADC Module Configuration Bits and Example
๐Ÿ”’
Interrupts and External Interrupt Source
๐Ÿ”’
PortB Line Change Interrupt Source
๐Ÿ”’
EEPROM Data Write Interrupt
๐Ÿ”’
Interrupt Handlers and INTCON Register
๐Ÿ”’
Option Register
๐Ÿ”’
Programming the External Interrupt RB0 Example
๐Ÿ”’
PortB 4 7 Status Change Interrupt
๐Ÿ”’
RB0 and RB4-7 Interrupt Example
๐Ÿ”’
Serial Communication Introduction and Basics
๐Ÿ”’
Synchronous Serial Transmission and RS232
๐Ÿ”’
Essential Concepts in Serial Communication
๐Ÿ”’
PIC TO PIC And PIC TO PC Communication
๐Ÿ”’
Serial Communication Example PIC TO PC
๐Ÿ”’
Timers and Counters
๐Ÿ”’
Timer0 Interrupt
๐Ÿ”’
Delay Using Timer0
๐Ÿ”’
Timer0 Interrupt Programming Delay Loops
๐Ÿ”’
Interrupt Driven Timers
๐Ÿ”’
Timers0 as a Counter
๐Ÿ”’
Introduction
๐Ÿ”’
Quick Overview
๐Ÿ”’
Quick Comparison
๐Ÿ”’
PIC 16F
๐Ÿ”’
PIC 18F
๐Ÿ”’
PIC18F Vs PIC16F
๐Ÿ”’
IO Register Differences
๐Ÿ”’
Writing Bit by Bit TRIS PORT and LAT
๐Ÿ”’
Writing to Whole Register
๐Ÿ”’
Coding Flasher
๐Ÿ”’
Simulate Flasher
๐Ÿ”’
Coding Flasher with Input
๐Ÿ”’
Who We Are
๐Ÿ”’
Introduction
๐Ÿ”’
First Project Goal and Components
๐Ÿ”’
First Project Circuit
๐Ÿ”’
First Project Code Explained
๐Ÿ”’
First Project Simulation
๐Ÿ”’
Burning The Code To PIC Microcontroller
๐Ÿ”’
First Project Practical Work
๐Ÿ”’
Second Project Goal and Components
๐Ÿ”’
Second Project Circuit
๐Ÿ”’
Second Project Code
๐Ÿ”’
Second Project Simulation
๐Ÿ”’
Second Project Practical Work
๐Ÿ”’
Third Project Goal and Components
๐Ÿ”’
Third Project Circuit
๐Ÿ”’
Third Project Code and Simulation
๐Ÿ”’
Third Project Practical Work
๐Ÿ”’
End
๐Ÿ”’
Download and Install MikroC Software
๐Ÿ”’
Download and Install Proteus Software
๐Ÿ”’
Who We Are
๐Ÿ”’
Introduction
๐Ÿ”’
Who We Are
๐Ÿ”’
Hardware and Software Requirements
๐Ÿ”’
Working Principle
๐Ÿ”’
Circuit Design
๐Ÿ”’
Coding PIC Microcontroller to Send and Receive Serial Data
๐Ÿ”’
Preparing Python and PySerial Library
๐Ÿ”’
Download and Install Python Editor
๐Ÿ”’
Getting Started with Python Coding
๐Ÿ”’
Python Script Coding
๐Ÿ”’
Virtual COM Port Setup
๐Ÿ”’
Configure Serial Communication
๐Ÿ”’
Editing Circuit and C Code
๐Ÿ”’
Editing Python Script and Practical Implementation
๐Ÿ”’
PIC Microcontroller to Python
๐Ÿ”’
Introduction
๐Ÿ”’
Installing Python and PIP
๐Ÿ”’
Main Communication Concept Explained
๐Ÿ”’
Uploading Arduino Communication Sketch
๐Ÿ”’
Installing Pyfirmata and a Python text editor
๐Ÿ”’
Code and Control Arduino with Python Code
๐Ÿ”’
Reading Digital Input and Sending Digital Output with Python
๐Ÿ”’
Download and Install MikroC Pro
๐Ÿ”’
Download And Install Proteus Software Free
๐Ÿ”’
Introduction
๐Ÿ”’
Communication Protocol RS232
๐Ÿ”’
Serial Ports and Connectors
๐Ÿ”’
Setting Communication Protocol RS232 in Windows Environment
๐Ÿ”’
Download and Install Visual Studio Final
๐Ÿ”’
Downloading and Installing Proteus and Mikroc
๐Ÿ”’
Download and Install MikroC Software
๐Ÿ”’
Who We Are
๐Ÿ”’
Introduction
๐Ÿ”’
What is I2C
๐Ÿ”’
Things You Need to Know about I2C
๐Ÿ”’
Advantages to I2C
๐Ÿ”’
Disadvantages to I2C
๐Ÿ”’
I2C Bus Operation
๐Ÿ”’
Operation Explained in More Details
๐Ÿ”’
I2C Pins in Arduino
๐Ÿ”’
Arduino Wire Library I2C Functions
๐Ÿ”’
Arduino to Arduino I2C Example Circuit Design
๐Ÿ”’
Arduino to Arduino I2C Example Coding
๐Ÿ”’
Arduino to DS1307 Time and Date Module Circuit Design
๐Ÿ”’
I2C Library Routines
๐Ÿ”’
Circuit Design for I2C Testing
๐Ÿ”’
Coding Simple Example
๐Ÿ”’
Reading Data from DS1307 Time and Date IC
๐Ÿ”’
What is SPI
๐Ÿ”’
SPI Working Principle
๐Ÿ”’
SPI Library in MikroC Pro IDE
๐Ÿ”’
Circuit Design
๐Ÿ”’
Coding
๐Ÿ”’
Arduino SPI Pins
๐Ÿ”’
Arduino SPI Library
๐Ÿ”’
Circuit Design Arduino to Arduino SPI Communication
๐Ÿ”’
Coding Master
๐Ÿ”’
Coding Slave
๐Ÿ”’
Introduction to the USB World
๐Ÿ”’
Advantages of USB Communication
๐Ÿ”’
USB Pin-out Port Wiring
๐Ÿ”’
USB Transfer speeds
๐Ÿ”’
USB Device Classes
๐Ÿ”’
Introduction to Descriptors
๐Ÿ”’
Creating a descriptor file in MikroC
๐Ÿ”’
Creating a descriptor file in MikroC - Practical
๐Ÿ”’
USB Libraries HID Enable
๐Ÿ”’
USB RAM
๐Ÿ”’
USB Functions
๐Ÿ”’
Circuit Design for First Example
๐Ÿ”’
Installing the Virtual USB Port Feature to enable Simulation
๐Ÿ”’
First Example Send and Receive Data
๐Ÿ”’
Second Example Send Characters and Check the incoming Data
๐Ÿ”’
Third Example Turn Leds On and Off via USB
๐Ÿ”’
Forth Example Reading Input - Button Press
๐Ÿ”’
Burning the Code to PIC using A Programmer
๐Ÿ”’
MikroC and Ql2006 Right Configuration for the Code file
๐Ÿ”’
DEVICE DRIVERS FOR USB interfacing with pic microcontroller
๐Ÿ”’
Practical Circuit Assembly
๐Ÿ”’
What is GUI
๐Ÿ”’
Microsoft Visual Studio
๐Ÿ”’
Proteus Virtual USB Installation
๐Ÿ”’
Different Communication Methods that Can be used
๐Ÿ”’
What is Serial Communication and RS232
๐Ÿ”’
How To Create Your First GUI Project Quick Intro
๐Ÿ”’
How to Create RS232 Serial Interfacing Circuit Board
๐Ÿ”’
Circuit Design for Two Leds Controlled by PIC Microcontroller
๐Ÿ”’
Code Your Microcontroller to Send and Receive Serial Data
๐Ÿ”’
Create Your First GUI to Control Two Leds
๐Ÿ”’
Control PIC Microcontroller using GUI
๐Ÿ”’
Download and Install Proteus Software
๐Ÿ”’
Download and Install MikroC Software
๐Ÿ”’
Download and Install Arduino Software
๐Ÿ”’
Download and Install Fritzing Software
๐Ÿ”’
Download and Install Microsoft Visual Studio
๐Ÿ”’
Who We Are
๐Ÿ”’
Introduction
๐Ÿ”’
Interfacing a Light Emitting Diode (LED)
๐Ÿ”’
LED Interfacing Explained with Example
๐Ÿ”’
LED Interfacing Practical
๐Ÿ”’
Switch Interfacing
๐Ÿ”’
LDR Interfacing
๐Ÿ”’
Pizeo Sound Tone Interfacing
๐Ÿ”’
LCD Display Interfacing
๐Ÿ”’
What is LCD Display
๐Ÿ”’
What is MikroC Pro and How to Download and Install it
๐Ÿ”’
What is PICSimlab Alternative Simulation Software
๐Ÿ”’
LCD Library and Routines
๐Ÿ”’
LCD Initialization
๐Ÿ”’
LCD Output to Display Text on LCD
๐Ÿ”’
LCD Character Output Routine
๐Ÿ”’
LCD Commands and how to deal with them
๐Ÿ”’
How to Use PICSimLab Simulation Boards with MikroC
๐Ÿ”’
LCD Simulation
๐Ÿ”’
LCD Shift Text
๐Ÿ”’
7 Segment Display Interfacing
๐Ÿ”’
7 Segment Display Interfacing Practical Lesson with Coding
๐Ÿ”’
Interfacing a Transistor
๐Ÿ”’
Darlington Driver IC Interfacing
๐Ÿ”’
Buzzer Interfacing
๐Ÿ”’
Relay Interfacing
๐Ÿ”’
Download And Install Proteus Software Free
๐Ÿ”’
Download and Install MikroC Software
๐Ÿ”’
Who We Are
๐Ÿ”’
Bonus Lecture
๐Ÿ”’
Quiz
Learning Outcomes

What you'll achieve after this programme

โœ“

Learn fundamentals of PIC microcontroller architecture and embedded systems

โœ“

Build real-world circuits interfacing sensors motors and display modules

โœ“

Develop embedded C programs for controlling hardware and automation tasks

โœ“

Apply debugging techniques to fix errors in live project environments

โœ“

Master tools like MPLAB X and simulation for efficient development

โœ“

Design and implement communication protocols like UART SPI and I2C

โœ“

Create a complete embedded system capstone project with real applications

โœ“

Gain internship experience and earn certificate for embedded systems careers

One Programme, Everything Included

What's included with enrolment

490 on-demand video lessons โ€” lifetime access
Course Completion Certificate (EasyShiksha)
Internship Joining Letter + Internship Certificate
Certificate of Completion from Kalinga University
Real-world projects & assignments
Interview preparation materials
Mobile & desktop access, any device
30-day full money-back guarantee
Your Future Self

Imagine after completing this programme

Picture yourself with skills, experience, and three credentials that open real doors.

๐Ÿ’ป

You gain practical skills

Learn step-by-step and build real understanding you can apply in real situations.

๐Ÿ“‹

You can apply for jobs

Walk into interviews with certified skills, a portfolio project, and a credential most freshers don't have.

๐Ÿข

You have internship experience

Show a real offer letter and internship certificate โ€” proof of experience beyond a course completion.

๐Ÿ”—

Your LinkedIn stands out

Three shareable credentials on your profile โ€” recruiters and hiring managers notice verified credentials instantly.

๐Ÿง 

You build real confidence

Move from confusion to clarity by actually learning and applying new concepts.

๐Ÿ“ˆ

Your career trajectory changes

From feeling behind to being ahead โ€” one decision today can change the trajectory of your career.

Student Voices

What learners say about earning the university certificate

โ˜…โ˜…โ˜…โ˜…โ˜…

"Having a university certificate alongside the course certificate made my resume look completely different in campus interviews โ€” recruiters actually asked about it."

R
Rishav RajVerified Learner
โ˜…โ˜…โ˜…โ˜…โ˜…

"The curriculum covers real project work, not just theory. Finishing with a university-backed certificate felt like a genuine milestone, not just a download."

A
Ashish KumarVerified Learner
โ˜…โ˜…โ˜…โ˜…โ˜…

"The combination of real-world MERN projects and a certificate from Kalinga University gave me the confidence to apply for developer roles."

N
Neha Verma Verified Learner
Your Path

What happens after you enrol

01

Get instant access

Your course dashboard unlocks within seconds of payment. No waiting, no shipping.

02

Complete the curriculum

Work through all 490 lessons, quizzes, and assignments at your own pace.

03

Finish the internship

Receive your offer letter, complete the internship module, and build your project portfolio.

04

Receive all three certificates

Download your Course, Internship, and Kalinga University certificates โ€” ready to share.

Still Not Sure?

We've got answers to your concerns

No judgement. These are the most common doubts students have โ€” and why they don't matter.

"I have zero prior experience"

This course starts from absolute zero. Thousands of beginners have completed it.

"Will this work for a student?"

This is built specifically for students. The internship and university certificate give you the resume boost you need before graduation or first job applications.

"I don't have much time"

Lifetime access means you go at your own pace โ€” 30 minutes a day is enough. No deadlines, no expiry.

"What if I need help?"

Support is available. Reach out via our help centre and get guidance. You're never stuck alone in this programme.

Don't miss out โ€” this has real consequences
  • Every day you delay is a day without internship experience on your resume
  • Your competition is already enrolling and building their portfolio
  • Missing this means falling behind candidates who did enrol
Why Start Now

The opportunity won't wait

Every day you delay is a missed opportunity to grow your skills. Learners who start today gain the advantage โ€” whether it's building skills, improving careers, or unlocking new opportunities.

High Competition in Every Field

Thousands of learners are upgrading their skills daily. Those with practical knowledge and certification stand out faster.

Skills Are in High Demand

Industries are evolving rapidly. Learning relevant skills today opens doors to better opportunities tomorrow.

Early Learners Get the Advantage

Starting early helps you gain experience, confidence, and a strong edge over others.

Limited-Time Access Benefits

This offer is available for a limited time. Secure your access and start learning before the opportunity closes.

Still Thinking?

Here's everything that makes this a no-brainer

No prior experience needed โ€” start from absolute zero
Risk-free โ€” 30-day full refund guarantee
Student-friendly pricing โ€” see details at checkout
Beginner friendly โ€” explained step by step
One-time payment โ€” access forever
Real internship certificate included
Student-Friendly Pricing

One programme. One payment. Three certificates.

Same course and internship pricing you already know from EasyShiksha โ€” the Kalinga University Certificate is included at no extra cost.

  • Full course access โ€” 490 videos, lifetime
  • Internship joining letter + certificate
  • Kalinga University Certificate of Completion
  • Projects, assignments & interview prep
INCLUDES UNIVERSITY CERTIFICATE
Go to Class Room
30-day money-back guarantee ยท No questions asked
02Hrs
14Min
19Sec
Common Questions

Frequently asked questions

Is the Kalinga University certificate different from the EasyShiksha certificate?+

Yes โ€” you receive both. The EasyShiksha certificates confirm completion of the course and internship; the Kalinga University certificate is a separate, university-issued Certificate of Completion carrying the university's name and signature.

What do I need to do to earn the university certificate?+

Complete the full Complete PIC Microcontroller Bootcamp curriculum, assignments, and the capstone project as set out in the course content above.

Is Kalinga University recognised?+

Kalinga University, Raipur is and NAAC B+ accredited , with AICTE approval for its technical programmes.

Will the certificate have my name and course details on it?+

Yes, your certificate is personalised with your name, the programme name, and completion details, and is shareable on LinkedIn and your resume.

Does adding the university certificate change the price?+

No โ€” it's included in the existing EasyShiksha course and internship pricing at no extra cost.

Do I need any prior coding experience to start?+

No. The course starts from absolute zero and builds up to job-ready, full-stack skills โ€” thousands of beginners have completed it.

How long do I have to complete the programme?+

You get lifetime access, so you can learn at your own pace โ€” 30 minutes a day is enough, with no deadlines or expiry.

Can I use this internship as real experience in job interviews?+

Yes. Many students use the official offer letter and internship certificate as proof of practical experience, even as first-time job seekers.

Is the course 100% online? Does it require any offline classes?+

Yes, the entire programme โ€” lessons, projects, internship, and the university certification process โ€” is delivered online.

Can I just enrol in a single course?+

Yes, this Complete PIC Microcontroller Bootcamp programme with internship and university certificate can be taken as a standalone enrolment.

What is the refund policy?+

The programme comes with a 30-day full money-back guarantee if you're not satisfied โ€” no questions asked.

Can I download the notes and study material?+

Yes, lesson notes and supporting study material are available for download from your dashboard alongside the video lessons.

Do I get the certificates in a hard copy?+

Certificates are issued digitally and are shareable on LinkedIn and your resume. Check with support for hard-copy options if required.


Enrol โ€” includes University Certificate Go to Class Room
Whatsapp Email Support

Experience the Speed: Now Available on Mobile!

Download EasyShiksha Mobile Apps from Android Play Store, Apple App Store, Amazon App Store, and Jio STB.

Curious to learn more about EasyShiksha's services or need assistance?

Our team is always here to collaborate and address all your doubts.

Message should be at least 50 characters long.